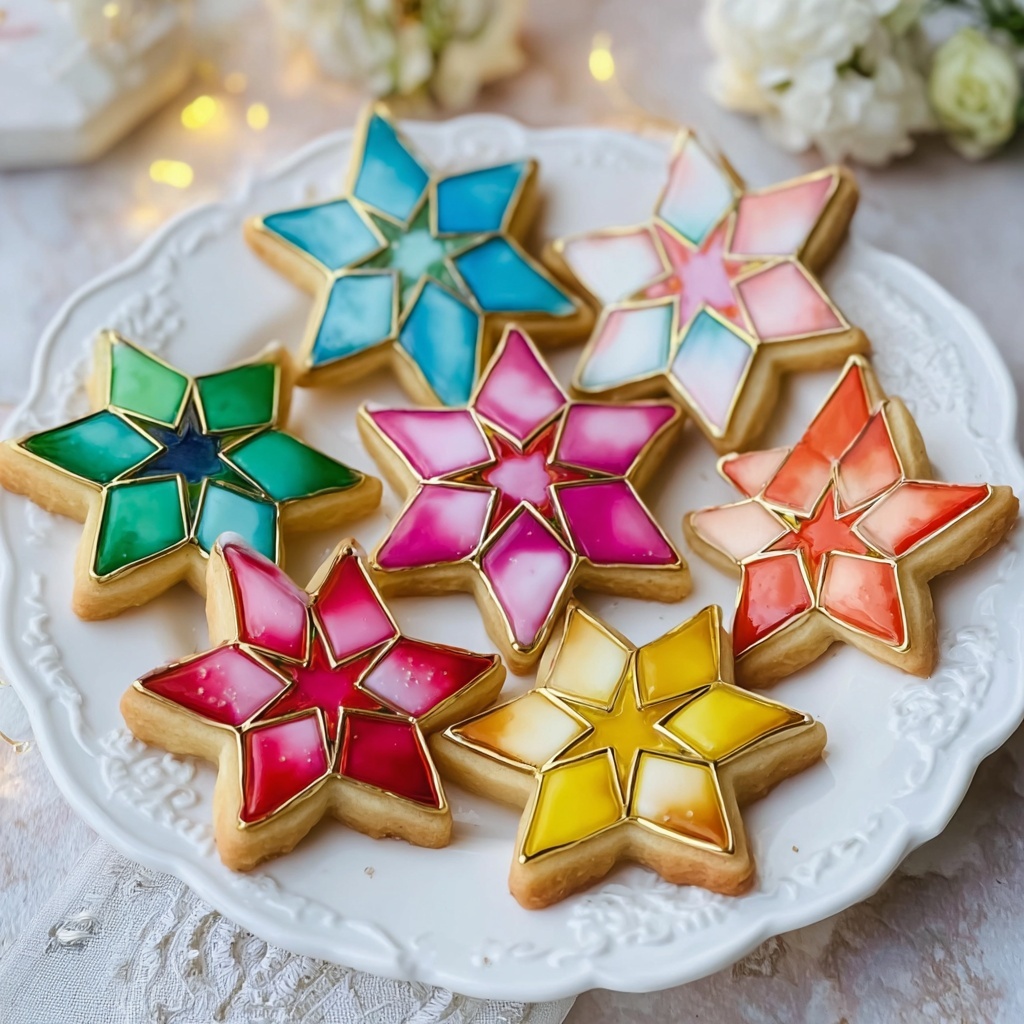
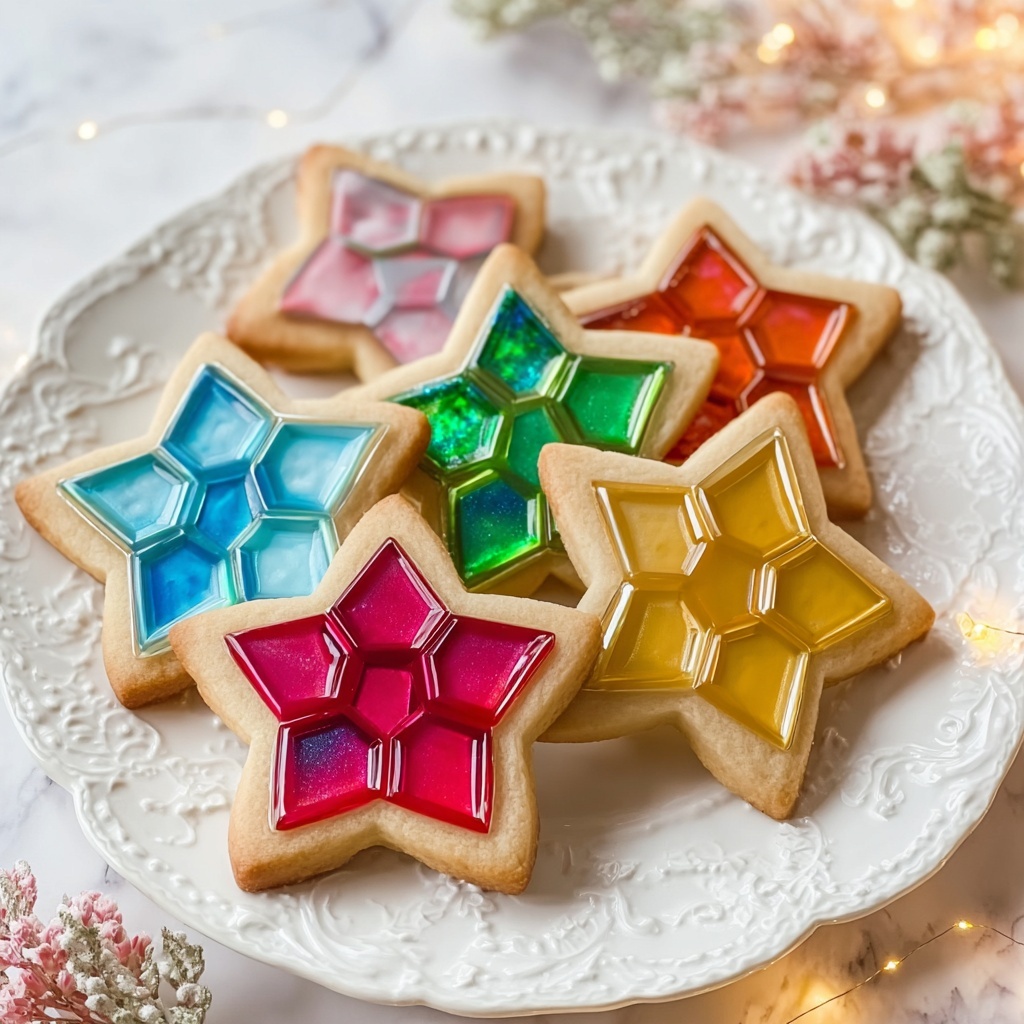
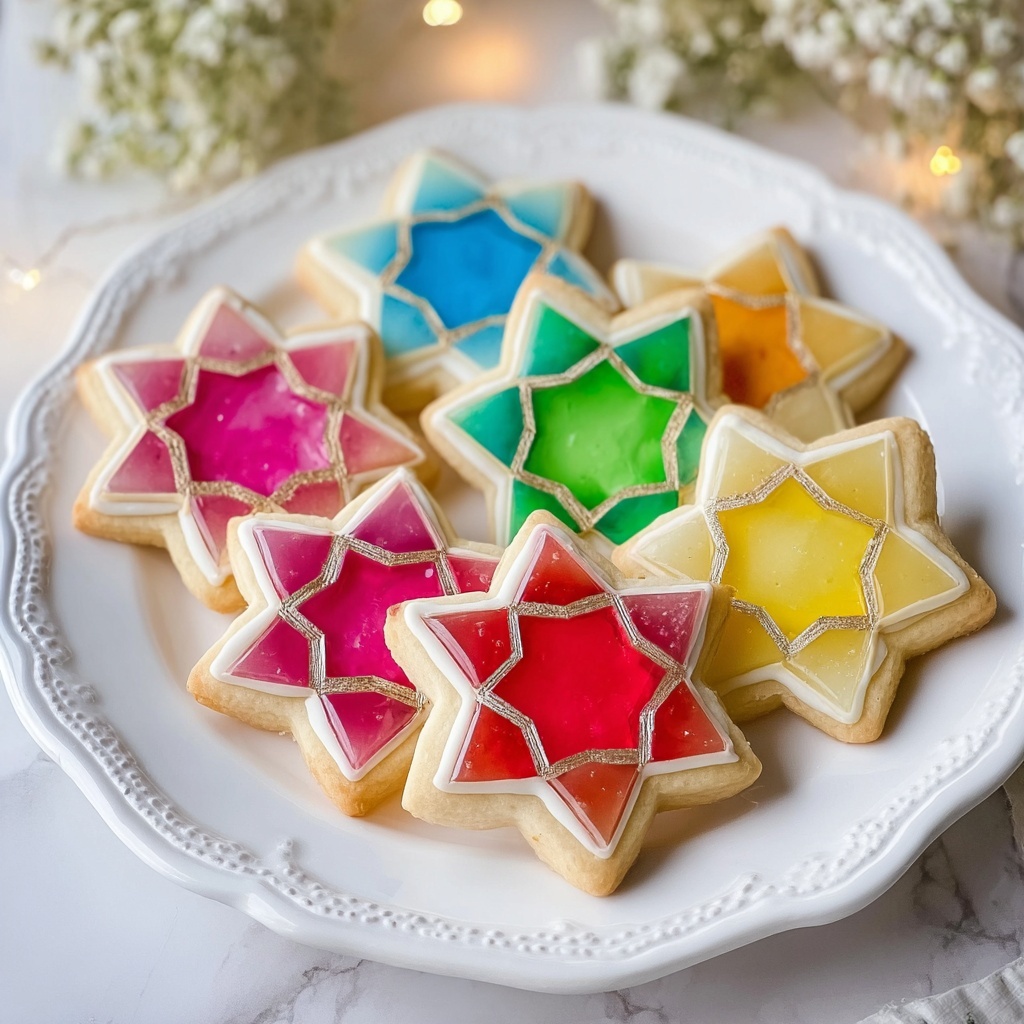
If you have a sweet tooth and love festive, colorful treats, the Stained Glass Cookies Recipe is about to become your new favorite! These charming cookies combine buttery, tender dough with vibrant, glass-like centers created by melting hard candies. They catch the light beautifully and are as fun to make as they are to eat, making them perfect for holidays, special occasions, or simply brightening up an ordinary day with a bit of edible art.
Ingredients You’ll Need
The magic of Stained Glass Cookies lies in its simplicity. Each ingredient is straightforward and vital: the butter and sugar bring richness and sweetness, the egg and vanilla add flavor and structure, while the flour creates the perfect base for the dough. Finally, crushed hard candies transform these cookies into dazzling stained glass masterpieces with their brilliant colors and glossy finish.
- 1 cup unsalted butter, softened: Soft butter ensures your dough will be tender and easy to work with.
- 1 cup granulated sugar: Adds the perfect amount of sweetness and helps with cookie crispness.
- 1 large egg: Binds the ingredients and gives the dough structure for cutting shapes.
- 1 teaspoon vanilla extract: Adds a warm, comforting aroma and enhances the flavor.
- 3 cups all-purpose flour: The backbone of the dough, providing structure and bulk.
- 1/2 teaspoon salt: Balances sweetness and enhances overall flavor.
- 1/2 teaspoon baking powder: Gives the cookies a subtle rise for a light texture.
- 1 cup crushed hard candies (like Jolly Ranchers): Creates the stained glass effect with vibrant, colorful centers that melt perfectly.
How to Make Stained Glass Cookies Recipe
Step 1: Preheat and Prepare
Start by heating your oven to 350°F (175°C). This ensures it’s ready for your cookies as soon as the dough is shaped. Preparing early means you won’t lose any momentum or warmth in the kitchen.
Step 2: Cream Butter and Sugar
In a large bowl, cream together the softened butter and granulated sugar until the mixture is smooth and fluffy. This step is crucial as it creates air bubbles that help give your cookies a light texture.
Step 3: Add Egg and Vanilla
Beat in the egg and vanilla extract until the mixture is well combined. The egg not only binds everything; the vanilla infuses a lovely scent and depth of flavor.
Step 4: Combine Dry Ingredients
In a separate bowl, whisk together the flour, salt, and baking powder. Thorough mixing ensures that these dry components distribute evenly, preventing clumps and helping your cookies bake uniformly.
Step 5: Form the Dough
Gradually stir the dry ingredient mix into the butter mixture until a soft dough forms. Avoid overmixing, as that can make your cookies tough instead of tender and delicate.
Step 6: Roll and Cut the Dough
Lightly flour your surface and roll out the dough to about 1/4 inch thick. Use your favorite cookie cutters to cut out shapes. Then, take a smaller cutter to punch out the center of each cookie, creating a frame where the “stained glass” will shine.
Step 7: Add Crushed Candies
Arrange the cookie frames on a baking sheet lined with parchment paper. Fill each center with the crushed hard candies. These will melt during baking to create the signature glass-like effect.
Step 8: Bake to Perfection
Bake the cookies for 8-10 minutes. Keep an eye on them—the edges should turn a light golden brown while the candy centers melt smoothly but don’t burn.
Step 9: Cool Completely
Allow your stained glass cookies to cool fully on the baking sheet. This cooling sets the candy centers, making the cookies easier to handle and giving that beautiful translucent look.
How to Serve Stained Glass Cookies Recipe
Garnishes
Although these cookies are stunning on their own, you can sprinkle a touch of powdered sugar for an elegant frosted effect or decorate the edges with a thin piping of royal icing to add contrast and extra sweetness. Fresh mint leaves alongside make for a charming presentation.
Side Dishes
Pair these colorful delights with a warm cup of hot chocolate, chai tea, or freshly brewed coffee. The warmth of your beverage beautifully complements the crisp cookie and cool candy center, enhancing the overall tasting experience.
Creative Ways to Present
Arrange the stained glass cookies in a single layer on a clear glass platter and place them near a window or candlelight to showcase their translucent centers glowing like miniature jewels. For gift-giving, stack and tie them with festive ribbons or place them in clear cellophane bags for a delightful treat that’s sure to impress.
Make Ahead and Storage
Storing Leftovers
You can keep these cookies fresh by storing them in an airtight container at room temperature for up to one week. Make sure they are completely cooled before storage to prevent the candy centers from sticking or sweating.
Freezing
If you want to save them for later, freeze the cookie dough before baking for up to three months. Bake them fresh from frozen, adding a couple of extra minutes to the baking time. Avoid freezing baked cookies with candy centers as the texture can become compromised.
Reheating
These cookies are best enjoyed at room temperature, but if you prefer them a little warm, gently heat them in a low oven (around 275°F) for just a couple of minutes to soften the candy centers without melting them completely again.
FAQs
Can I use different types of candy for the centers?
Absolutely! While Jolly Ranchers are popular for their vibrant colors and melting properties, you can experiment with other hard candies. Just make sure they crack into small pieces and don’t contain fillings or coatings that might burn.
What if I don’t have cookie cutters with smaller centers?
No worries! You can use a small round piping tip or even the cap of a bottle to cut out the center of the cookies. The key is to create a hole large enough to hold the crushed candy without collapsing the dough frame.
Why do my candy centers sometimes turn dull or cloudy?
This can happen if the candy overheats or if the humidity is high. Baking at the correct temperature and allowing cookies to cool fully in a dry environment helps keep those centers beautifully clear and shiny.
Can these cookies be made gluten-free?
Yes, by substituting the all-purpose flour with a gluten-free baking blend, you can make these cookies suitable for gluten-sensitive friends. Just be mindful that dough texture may vary slightly, so you might need to adjust the flour amount.
Is it necessary to chill the dough before rolling it out?
For this particular recipe, chilling isn’t essential due to the dough’s firm texture from the butter. However, if you find it too soft or sticky, a short chill of about 20-30 minutes helps make rolling and cutting easier.
Final Thoughts
I cannot recommend enough giving this Stained Glass Cookies Recipe a go. It’s a fantastic mix of simple ingredients and fun technique that turns everyday baking into a dazzling display of creativity and flavor. Whether you’re baking with kids or just for yourself, these cookies light up the kitchen and your taste buds with every colorful bite. Happy baking!
Print
Stained Glass Cookies Recipe
- Prep Time: 20 minutes
- Cook Time: 10 minutes
- Total Time: 30 minutes
- Yield: 24 servings
- Category: Dessert
- Method: Baking
- Cuisine: American
Description
These colorful Stained Glass Cookies are a fun and festive treat perfect for parties and holidays. Featuring a buttery sugar cookie base with centers filled with melted crushed hard candies that create a beautiful stained glass effect, these cookies are as delightful to look at as they are to eat.
Ingredients
Cookie Dough
- 1 cup unsalted butter, softened
- 1 cup granulated sugar
- 1 large egg
- 1 teaspoon vanilla extract
- 3 cups all-purpose flour
- 1/2 teaspoon salt
- 1/2 teaspoon baking powder
Filling
- 1 cup crushed hard candies (like Jolly Ranchers)
Instructions
- Preheat the oven: Set your oven to 350°F (175°C) to ensure it reaches the correct temperature while you prepare the dough.
- Cream butter and sugar: In a large bowl, beat together the softened butter and granulated sugar until the mixture is smooth and creamy.
- Add egg and vanilla: Beat in the large egg and vanilla extract until fully incorporated into the butter-sugar mixture.
- Mix dry ingredients: In a separate bowl, whisk together the all-purpose flour, salt, and baking powder to evenly distribute the leavening agents and seasoning.
- Combine wet and dry: Gradually add the dry ingredient mixture into the butter mixture, stirring gently until a dough forms and all ingredients are well combined.
- Roll out dough: On a floured surface, roll the dough to a thickness of about 1/4 inch to ensure even baking and a sturdy frame for the candy filling.
- Cut cookie shapes: Use a larger cookie cutter to cut out your desired shapes, then use a smaller cutter to remove the center of each cookie, forming a frame.
- Prepare cookies for baking: Place the cookie frames on an ungreased baking sheet. Fill the centers with crushed hard candies, spreading the candy evenly within the cut-out space.
- Bake: Bake the cookies for 8-10 minutes, checking until the edges turn a light golden color and the candies have melted completely, creating a stained glass effect.
- Cool and set: Allow the cookies to cool on the baking sheet entirely before attempting to move them, so the candy centers harden and become stable.
Notes
- Use different colors of crushed hard candies to create vibrant stained glass effects.
- If the candy centers do not fully harden, refrigerate the cookies to help set the filling.
- Handle the cookies carefully while warm, as the candy centers will be hot and fragile.
- Store cookies in an airtight container at room temperature for up to a week.
- For best rolling results, chill the dough briefly if it becomes too soft to handle.


