
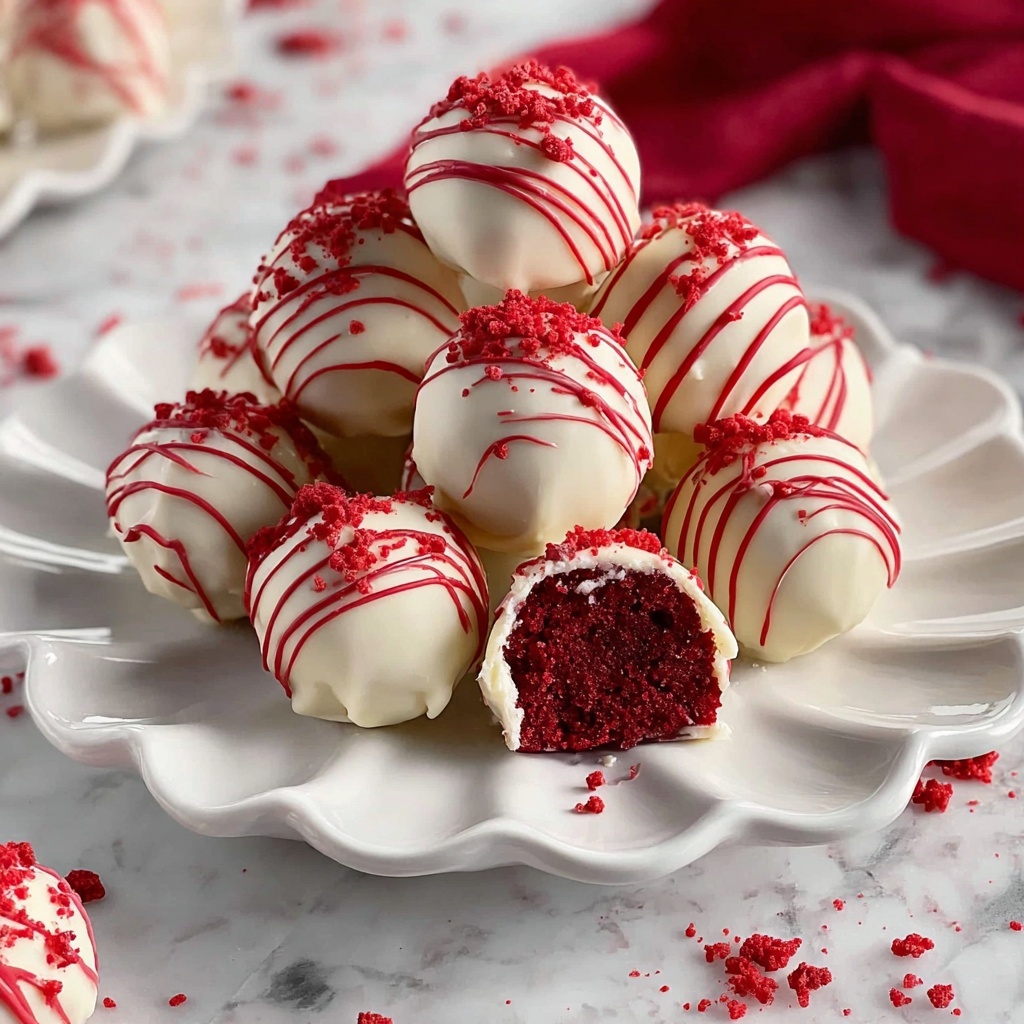
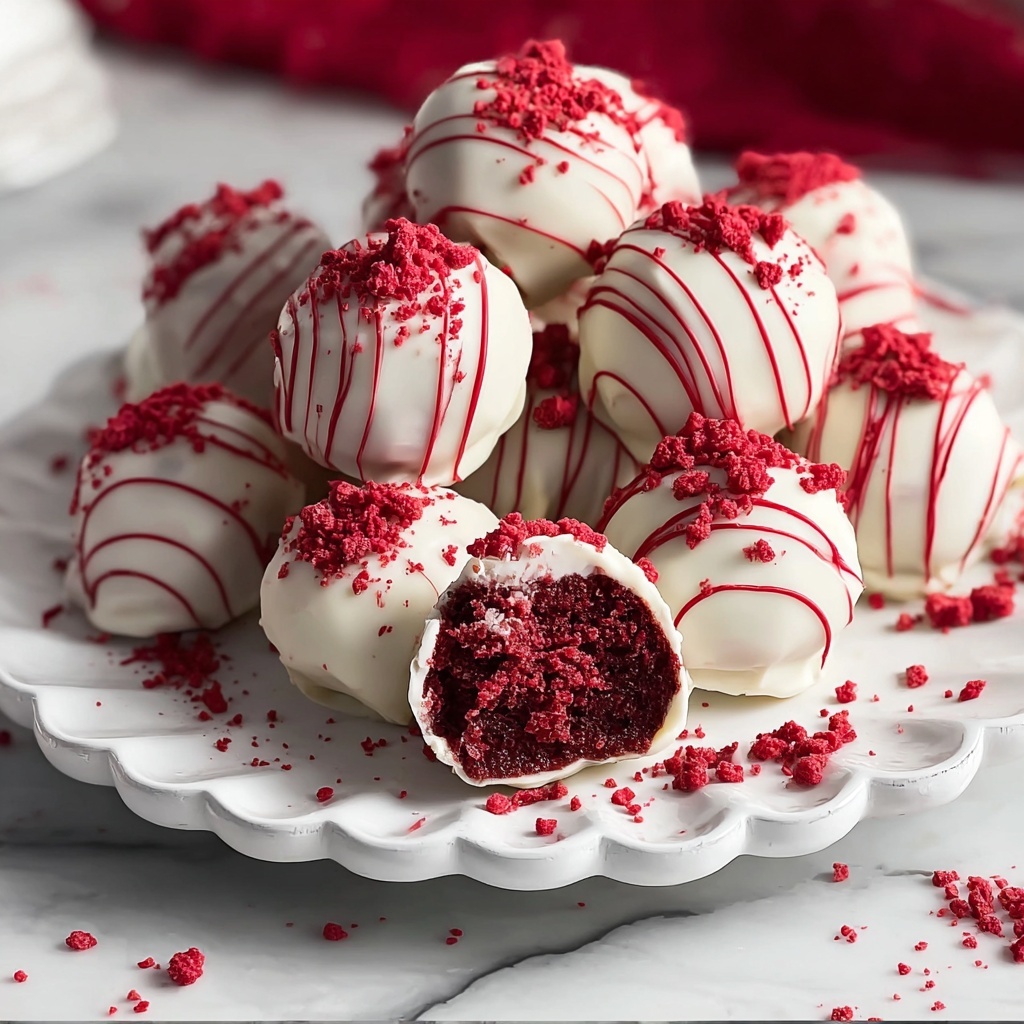
If you have a sweet tooth and love all things red velvet, then this Red Velvet Cake Balls Recipe is going to be your new obsession. These little bites pack all the rich, tangy flavor of red velvet cake combined with smooth cream cheese, then dipped in luscious white chocolate for a perfectly indulgent treat. Whether you’re looking for a fun party favor, a holiday dessert, or just a delightful snack to brighten your day, these cake balls are incredibly easy to make and simply irresistible.
Ingredients You’ll Need
The beauty of this Red Velvet Cake Balls Recipe lies in its simplicity. Each ingredient serves a clear purpose—from the rich red velvet cake base to the creamy frosting inside, and the sweet coating that ties it all together. Let’s look at what you need to create these delicious treats.
- Red velvet cake mix: The star ingredient providing that vibrant color and signature flavor that we all adore.
- Vegetable oil: Keeps the cake moist and tender, ensuring the balls stay soft.
- Water: Helps activate the cake mix and keep the texture just right.
- Eggs: Adds richness and structure to the cake for a perfect crumb.
- Full-fat cream cheese: Brings creamy tang and binds the cake crumbs into a smooth dough for rolling.
- White chocolate melting wafers: Create a sweet, crunchy shell to encase each cake ball beautifully.
- Red or pink sprinkles: Add a festive finishing touch for both color and texture.
How to Make Red Velvet Cake Balls Recipe
Step 1: Bake the Perfect Red Velvet Cake
Start by preparing your red velvet cake according to the box directions, usually baking in a 9×13 inch pan. Allowing the cake to cool completely is key—it helps the crumbs bind better later on. You want a tender crumb, not hot or soggy.
Step 2: Crumble the Cake
Once cooled, crumble the cake into fine pieces in a large bowl. This transforms the cake into a base ready to mix with the cream cheese, so take a few moments to break it up really well.
Step 3: Fold in the Cream Cheese
Add softened cream cheese to the crumbled cake and gently fold until you get a uniform dough. This mixture should be moist enough to hold together without being sticky. The cream cheese adds that dreamy creaminess and helps bind everything neatly.
Step 4: Form into Balls
Using your hands or a small scoop, roll the mixture into evenly sized balls. Place them on a parchment-lined baking sheet, giving each a little space so they don’t stick together. This is where the magic shapes into bite-sized perfection.
Step 5: Chill the Cake Balls
Pop your cake balls in the freezer for about 30 minutes or until firm. Chilling them ensures they hold up when dipped in warm chocolate.
Step 6: Melt the White Chocolate
Melt the white chocolate wafers gently either in the microwave at half power or with a double boiler. Stir frequently for a smooth, silky texture that’s perfect for dipping.
Step 7: Dip and Decorate
Dip each chilled cake ball into the melted chocolate, allowing the excess to drip off before placing them back on the parchment paper. Quickly add sprinkles before the coating sets to give that festive pop of color.
Step 8: Let Set Completely
Allow the coated cake balls to set at room temperature or speed up the process by refrigerating. Once firm, they’re ready to enjoy or package for gifting!
How to Serve Red Velvet Cake Balls Recipe
Garnishes
Sprinkles are the classic way to dress up these cake balls, but you can also experiment with crushed nuts, edible glitter, or a drizzle of contrasting chocolate for an elegant twist. Garnishes brighten the presentation and add extra texture to each bite.
Side Dishes
While red velvet cake balls are a treat all on their own, pairing them with a fresh cup of coffee, a glass of cold milk, or a scoop of vanilla ice cream elevates the experience. These accompaniments balance the sweetness wonderfully.
Creative Ways to Present
Try serving these on pretty platters or skewered on sticks arranged in a decorative jar for parties. Wrapping them individually in mini cupcake liners creates portable delights perfect for sharing with friends or gifting.
Make Ahead and Storage
Storing Leftovers
Keep leftover cake balls in an airtight container in the refrigerator for up to a week. This helps them stay fresh and firm while preventing the chocolate coating from softening too much.
Freezing
You can freeze red velvet cake balls for up to three months. Arrange them on a tray first to freeze solid, then transfer to a freezer-safe bag or container. Thaw overnight in the fridge before serving to enjoy their best texture.
Reheating
These cake balls are best served cold or at room temperature, so reheating is usually unnecessary. If you prefer them slightly warmer, leave them out at room temperature for 20 minutes and skip the microwave to avoid melting the chocolate shell.
FAQs
Can I use homemade red velvet cake instead of a box mix?
Absolutely! Homemade red velvet cake works wonderfully and will give your cake balls a personal touch. Just make sure the cake is completely cooled and not too moist for easy handling.
What can I substitute for cream cheese if I’m allergic?
You could try using a lactose-free cream cheese or a neutral-flavored frosting, but cream cheese is key for texture and flavor. Another option is mascarpone cheese, which has a similar creaminess.
How do I prevent cake balls from cracking?
Ensure your cake isn’t too dry and mix it gently with cream cheese until just combined. Overworking the dough or using a dry cake causes cracks when rolling or dipping.
Can I use dark or milk chocolate instead of white chocolate?
Yes! You can swap in dark or milk chocolate melting wafers if you prefer a richer, less sweet coating. Just adjust garnish colors accordingly for contrast.
How long do these cake balls keep at room temperature?
Because of the cream cheese, it’s best not to leave cake balls out for more than two hours to avoid spoilage. Refrigerate if you want to keep them longer.
Final Thoughts
This Red Velvet Cake Balls Recipe is pure joy wrapped into bite-sized treats, perfect for any occasion where you want to impress with minimal effort. Once you try these luscious, creamy, and chocolaty morsels, you’ll find yourself coming back to this recipe again and again. Go ahead, treat yourself and your loved ones—you deserve it!
Print
Red Velvet Cake Balls Recipe
- Prep Time: 10 minutes
- Cook Time: 30 minutes
- Total Time: 40 minutes
- Yield: 40 servings
- Category: Dessert
- Method: Baking
- Cuisine: American
Description
Delightfully rich and festive Red Velvet Cake Balls, combining moist red velvet cake with creamy full-fat cream cheese, coated in smooth white chocolate and adorned with colorful red or pink sprinkles. Perfect bite-sized treats for parties and celebrations.
Ingredients
Cake Ingredients
- 1 box (15 oz) red velvet cake mix
- ½ cup vegetable oil
- 1 cup water
- 3 large eggs, room temperature
Cake Ball Coating
- 1 cup full-fat cream cheese, room temperature
- 2 cups white chocolate melting wafers
- Red or pink sprinkles for garnish
Instructions
- Bake the Cake: Preheat your oven and prepare the red velvet cake batter according to the package instructions, typically baking it in a 9×13 inch pan at the recommended temperature for about 30 minutes. Once baked, remove from the oven and allow the cake to cool completely to room temperature.
- Crumble the Cake: Break the cooled cake apart into fine crumbs using your hands or a fork in a large mixing bowl to create a uniform texture for the cake balls.
- Mix in Cream Cheese: Add the room temperature full-fat cream cheese to the cake crumbs and gently fold together until a consistent, dough-like mixture forms, ensuring all crumbs are moistened evenly.
- Shape the Balls: Using a small cookie scoop or your hands, scoop and roll the mixture into small, bite-sized balls. Place each formed ball onto a parchment-lined baking sheet, spacing them evenly.
- Freeze the Balls: Place the baking sheet with cake balls into the freezer for about 30 minutes or until they are firm and chilled, which helps them hold shape when coating.
- Melt the Chocolate: Melt the white chocolate melting wafers by heating them in a microwave at 50% power, stirring every 20 seconds until smooth, or melt slowly using a double boiler to avoid burning.
- Coat the Cake Balls: Dip each chilled cake ball into the melted white chocolate, allowing any excess coating to drip off before placing the coated ball back onto the parchment paper.
- Decorate: While the white chocolate coating is still wet, immediately sprinkle red or pink sprinkles on top for a festive finish.
- Set and Serve: Let the coated cake balls sit at room temperature until the chocolate hardens completely. Once set, serve immediately or store in an airtight container in the refrigerator for up to one week.
Notes
- Ensure the cream cheese is at room temperature to mix smoothly with the cake crumbs.
- Freezing the cake balls before coating helps prevent them from falling apart in the melted chocolate.
- Use high-quality white chocolate melting wafers for a smooth and shiny coating.
- Store the cake balls in an airtight container in the fridge to maintain freshness.
- For easier dipping, keep the chocolate warm but not hot, reheating gently if it starts to harden.
