
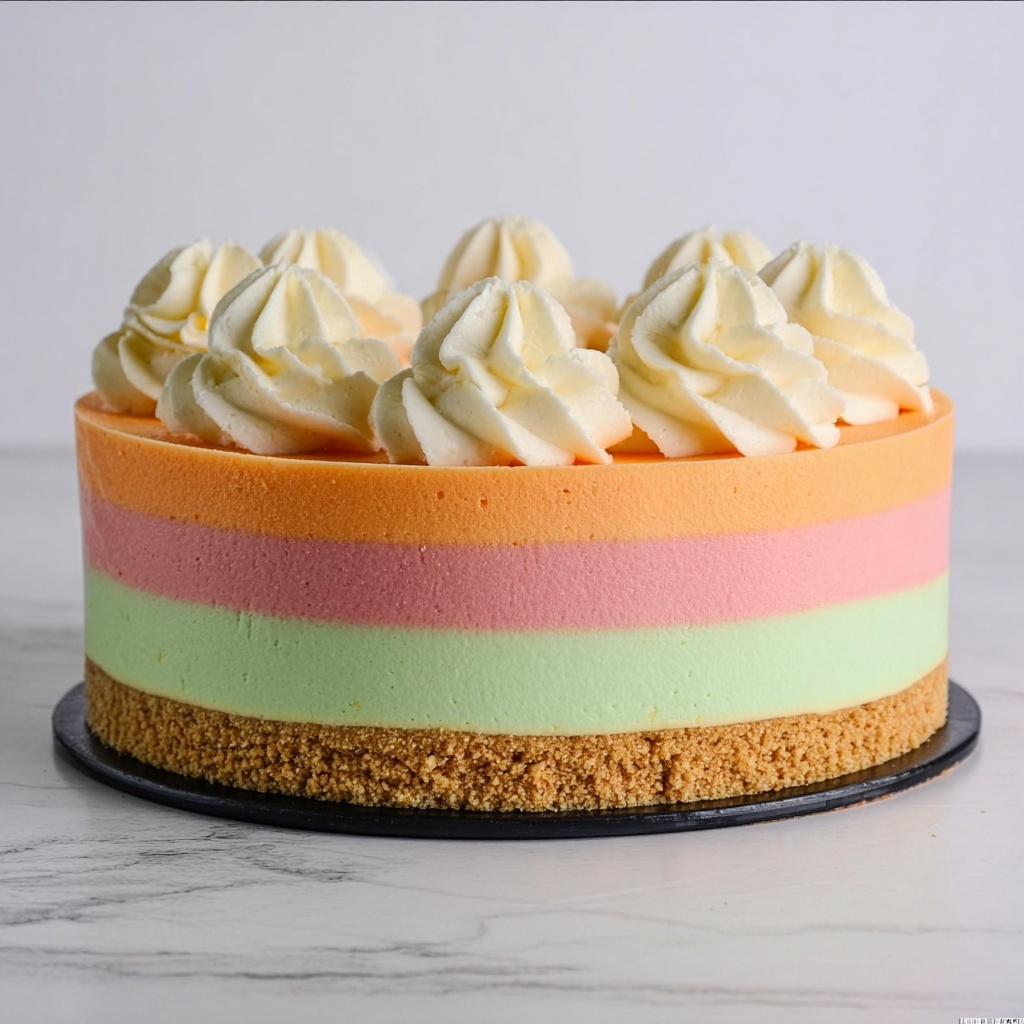
If you’re looking to delight your friends and family with a dessert that’s as joyful to look at as it is to eat, the Rainbow Sherbet Cake Recipe is an absolute must-try. This vibrant layered treat combines the tangy sweetness of colorful JELL-O sherbet flavors with a creamy, dreamy cheesecake filling and a crispy graham cracker crust. It’s a refreshing, no-bake wonder that beautifully captures that nostalgic sherbet experience in every bite. Whether it’s a summer party or a special occasion, this cake brings a burst of color and flavor that’s impossible to resist.
Ingredients You’ll Need
The magic of the Rainbow Sherbet Cake Recipe lies in its mix of simple yet essential ingredients, each adding its unique touch — from the crunchy, buttery base to the silky cream cheese layers bursting with fruity hues and flavors. These components come together effortlessly to create a cake that’s as delicious as it is visually stunning.
- Graham crackers (2 sleeves, crushed): The foundation for the crust, crushed to a fine texture for a perfect buttery crunch.
- Sugar (1 tablespoon for crust, 1 cup for filling): Adds just the right amount of sweetness to balance the tartness of the sherbet flavors.
- Butter (1 stick, melted): Binds the graham cracker crumbs together, giving the crust richness and structure.
- Cream cheese (4 packages, 8 ounces each, softened): Provides a creamy, velvety canvas that holds the sherbet flavors beautifully.
- Heavy cream (1 cup, to whip): Whipped to fluffy perfection, it lightens the filling and adds airy texture.
- JELL-O Lime, Cherry, and Orange (1 tablespoon each): These bring the iconic sherbet flavors and their vibrant colors, creating the signature layered look of the cake.
- Water: Used to dissolve the JELL-O powders, activating their bright flavors and colors.
How to Make Rainbow Sherbet Cake Recipe
Step 1: Prepare the Graham Cracker Crust
Start by crushing the graham crackers into fine crumbs — the finer, the better for a crust that sticks together nicely. Mix the crumbs with the tablespoon of sugar and melted butter until the mixture resembles wet sand. Press this crumb mixture firmly into the bottom of your cake pan to form an even layer. Pop it into the fridge to chill while you work on the dreamy filling, which gives the crust time to set perfectly.
Step 2: Whip the Cream Cheese and Heavy Cream
In a large bowl, beat the softened cream cheese until it’s smooth and creamy to avoid any lumps. Separately, whip the heavy cream until stiff peaks form, then gradually add the cup of sugar while continuing to whip a little more. Gently fold the whipped cream into the cream cheese — this creates the luscious, silky base that balances the tang and sweetness of the sherbet layers that follow.
Step 3: Divide and Flavor the Filling
Divide the creamy mixture evenly into three bowls. To each bowl, add a different flavor of JELL-O (lime, cherry, and orange), dissolved in a small amount of water according to package instructions. Stir gently until the color and flavor are fully incorporated, creating three distinct layers that bring the famous Rainbow Sherbet Cake Recipe to life.
Step 4: Layer and Chill the Cake
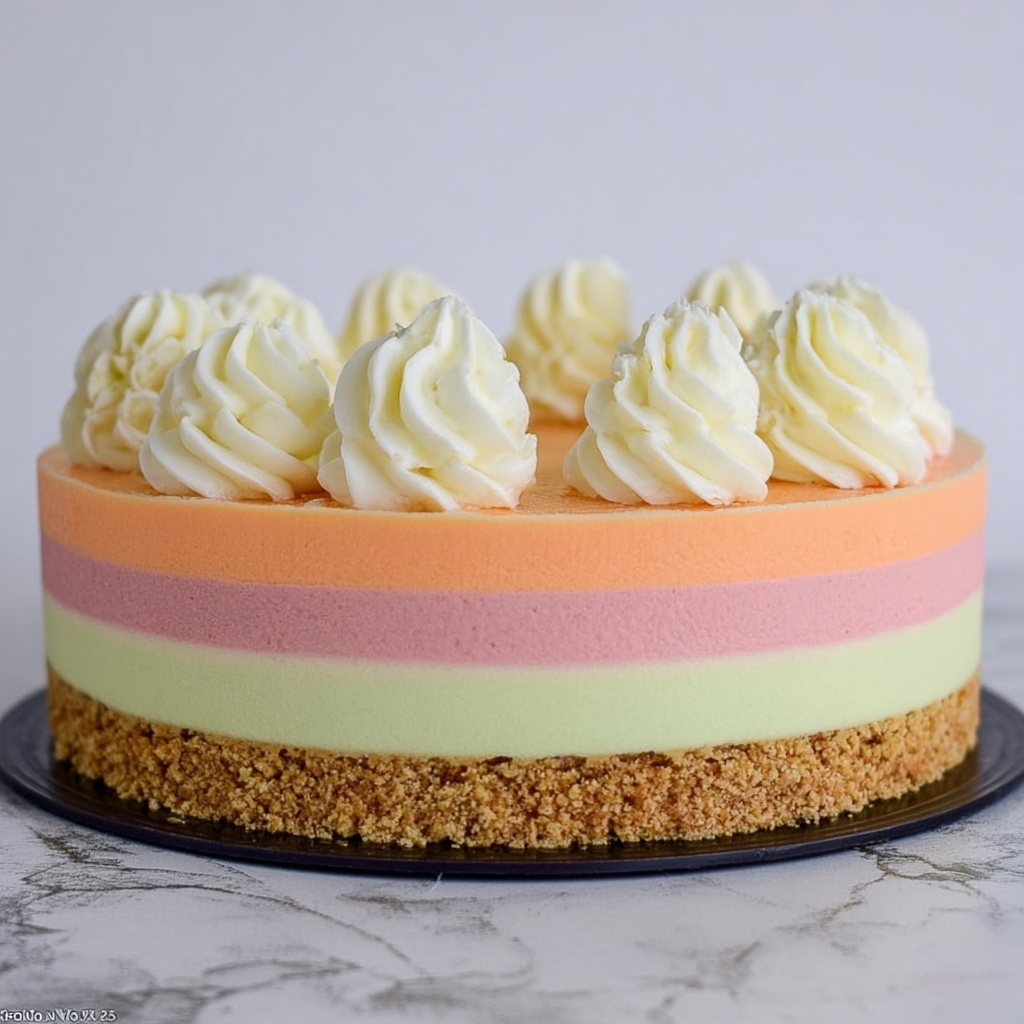
Begin layering your cake by spreading the lime-flavored cream cheese mix evenly over the chilled crust. Chill this layer briefly to set. Repeat with the cherry and then the orange layers, chilling between each to prevent mixing. This step is key to achieving those beautiful, vibrant stripes that make this cake a feast for the eyes as much as the palate.
Step 5: Final Chill and Serve
Once the layering is complete, allow the cake to chill for several hours or overnight in the refrigerator. This gives everything time to firm up and the flavors to meld, resulting in a refreshing, creamy sherbet-inspired delight that’s ready to impress.
How to Serve Rainbow Sherbet Cake Recipe
Garnishes
To make your Rainbow Sherbet Cake Recipe truly pop, consider topping it with fresh citrus slices like lime wedges, cherries, or orange segments. A dollop of whipped cream or a sprinkle of colorful sprinkles adds a fun, festive touch that pairs perfectly with the cake’s playful vibe.
Side Dishes
This cake shines on its own but can pair wonderfully with light, fresh sides like a crisp fruit salad or even a scoop of vanilla ice cream for those who want an extra indulgent sherbet experience. The contrast of textures adds a delightful dimension to your dessert spread.
Creative Ways to Present
For a unique twist, serve the cake in clear glass trifle bowls to showcase the beautiful sherbet layers. You can also cut it into bite-sized squares and serve it on colorful dessert plates for parties, making it easy to enjoy while highlighting the cake’s festive, rainbow look.
Make Ahead and Storage
Storing Leftovers
Keep your Rainbow Sherbet Cake Recipe tightly covered in the refrigerator, where it will stay fresh and creamy for up to 3 days. The flavors actually deepen with a little rest, so leftovers can be just as delightful as the first slice.
Freezing
This cake freezes beautifully! Wrap individual slices or the whole cake tightly with plastic wrap and aluminum foil to prevent freezer burn. Thaw overnight in the refrigerator before serving to maintain the perfect texture and flavor.
Reheating
No need to reheat this cool, refreshing dessert. It’s best enjoyed chilled right out of the fridge or after thawing. Just make sure it doesn’t sit at room temperature too long to keep its creamy texture intact.
FAQs
Can I use other JELL-O flavors for this Rainbow Sherbet Cake Recipe?
Absolutely! While lime, cherry, and orange are classic sherbet colors, you can experiment with other fruity JELL-O flavors. Just keep the layering concept and color contrast in mind for that signature sherbet effect.
Is this cake suitable for a summer party?
Definitely! The cool, fruity flavors and no-bake nature make the Rainbow Sherbet Cake Recipe perfect for hot weather. It’s a refreshing dessert that’s easy to make ahead and sure to impress guests.
Do I need any special equipment to make this cake?
Not at all! A simple mixing bowl, hand mixer, and a cake pan are all you need. The recipe is straightforward and designed to be accessible for all skill levels.
Can I make this cake vegan or dairy-free?
It’s a bit tricky since cream cheese and heavy cream are key to the texture and flavor, but you could try plant-based cream cheese and whipped coconut cream substitutes. Keep in mind, results may vary, but it’s a fun adaptation to experiment with!
How long does this cake need to chill before serving?
For the best results, allow the cake to chill for at least 4 hours or ideally overnight. This ensures the layers set properly and the flavors meld beautifully for that classic Rainbow Sherbet Cake Recipe experience.
Final Thoughts
If you want to make a dessert that truly stands out and brings smiles all around, give the Rainbow Sherbet Cake Recipe a try. Its colorful layers and creamy, fruity flavors make it a joyous treat that’s just as fun to make as it is to eat. Trust me, once you serve this up, it’ll become your go-to for any celebration needing a little extra color and sweetness.
Print
Rainbow Sherbet Cake Recipe
- Prep Time: 25 minutes
- Cook Time: 0 minutes
- Total Time: 4 hours 25 minutes
- Yield: 10 servings
- Category: Dessert
- Method: No-Cook
- Cuisine: American
- Diet: Vegetarian
Description
This delightful Rainbow Sherbet Cake is a vibrant, no-bake dessert featuring a crunchy graham cracker crust layered with smooth cream cheese and whipped cream blended with colorful JELL-O flavors. Perfect for summer parties or festive occasions, it combines the refreshing taste of sherbet with a creamy texture and a sweet, crunchy base.
Ingredients
Crust
- 2 sleeves of graham crackers – crushed into fine crumbs
- 1 heaping Tablespoon of sugar
- 1 stick of butter – melted
Filling
- 4 – 8 ounce packages of cream cheese – softened
- 1 cup of heavy cream – to whip
- 1 cup of sugar
- 1 Tablespoon of JELL-O Lime
- 1 Tablespoon of JELL-O Cherry
- 1 Tablespoon of JELL-O Orange
- Water – as required to dissolve JELL-O
Instructions
- Prepare the crust: Combine the crushed graham crackers with sugar and melted butter in a mixing bowl. Press the mixture firmly and evenly into the bottom of a 9×13 inch pan to form a solid crust. Chill in the refrigerator while preparing the filling.
- Dissolve JELL-O powders: In separate small bowls, dissolve each tablespoon of JELL-O (Lime, Cherry, and Orange) in the amount of hot water specified on the package (usually about 1/4 cup each). Allow them to cool to room temperature.
- Make the cream cheese mixture: In a large bowl, beat the softened cream cheese with 1 cup of sugar until smooth and creamy. In a separate bowl, whip the heavy cream until stiff peaks form. Gently fold the whipped cream into the cream cheese mixture to create a light and fluffy base.
- Divide and flavor the filling: Divide the cream cheese and whipped cream mixture evenly into three bowls. Add the cooled dissolved JELL-O Lime to one bowl, Cherry to another, and Orange to the third bowl. Gently fold each flavor into its portion without over-mixing.
- Layer the cake: Carefully spoon the flavored mixtures over the chilled graham cracker crust in layers, starting with lime, then cherry, and finally orange. Use a spatula to smooth each layer gently. Return the cake to the refrigerator and chill for at least 4 hours or until firm.
- Serve and enjoy: Once set, slice the cake into 10 servings and serve chilled for a refreshing and colorful dessert experience.
Notes
- Use full-fat cream cheese and heavy cream for the best creamy texture.
- Ensure the JELL-O mixtures are completely cooled before folding them into the cream cheese mixture to prevent curdling.
- Chilling the cake for at least 4 hours allows it to set properly and improves flavor melding.
- For a garnish, consider adding fresh fruit or a dollop of whipped cream on top before serving.

