
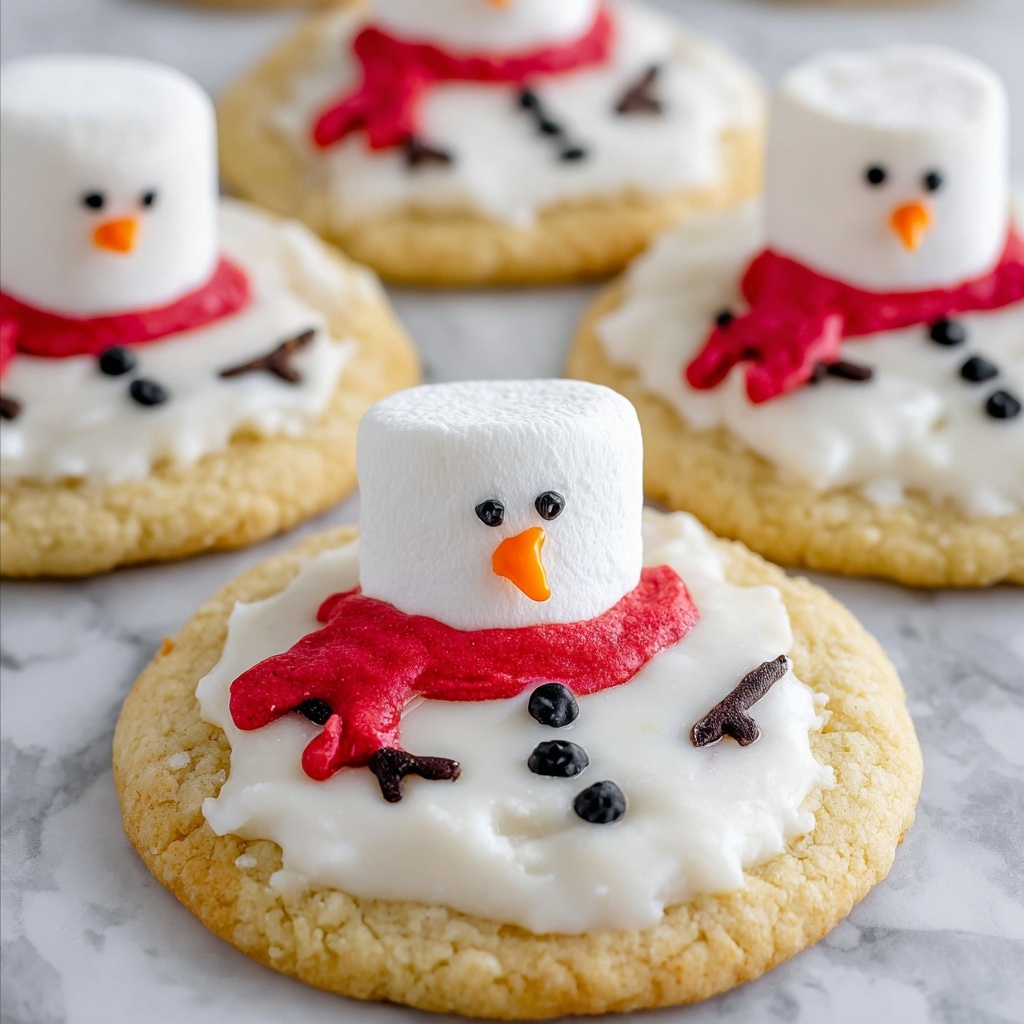
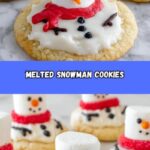
If you’re looking for a delightfully fun and festive treat, the Melted Snowman Cookies Recipe is your golden ticket to winter magic in a bite. These charming cookies capture the whimsy of a snowman melted into a puddle, complete with sweet marshmallow heads and colorful icing decorations that bring personality and cheer to every single cookie. Perfect for cozy gatherings or as an adorable holiday gift, this recipe combines soft sugar cookie dough, fluffy marshmallows, and playful edible details that will make everyone smile from the very first bite.
Ingredients You’ll Need
Don’t let the simplicity of these ingredients fool you—each one is essential in creating the perfect balance of flavor, texture, and visual appeal for your Melted Snowman Cookies Recipe. From the buttery sugar cookie dough serving as the base to the vibrant icing that adds personality, everything works together to make the magic happen.
- 1 16.5 ounce refrigerator sugar cookie dough: The rich, buttery dough provides a soft, chewy foundation for your melting snowmen; starting with pre-made dough speeds up the process without sacrificing quality.
- 1 large egg yolk: Helps bind the dough and gives the cookies a beautiful golden hue once baked.
- 1/2 cup all-purpose flour: Adds just the right amount of structure to create cookies that hold their shape but stay tender.
- 12 large marshmallows: These become the adorable snowman heads, soft and sweet, perfect for decorating with edible markers.
- 1 pouch each Betty Crocker™ Cookie Icing (white, red, and black): The icing colors let you draw snow puddles, scarves, buttons, and arms for that melted snowman look full of character.
- 2 edible markers (black and orange): Used to make snowman faces on marshmallows, adding the all-important eyes, mouth, and carrot noses with precision.
How to Make Melted Snowman Cookies Recipe
Step 1: Mix the Dough
Begin by placing the whole roll of refrigerator sugar cookie dough, the large egg yolk, and the 1/2 cup of all-purpose flour into a large mixing bowl. Using an electric mixer on medium speed, beat the ingredients together until the mixture is smooth and evenly combined. This extra step of incorporating the egg yolk and flour into the ready-made dough will give your cookies a lovely texture and make them easier to shape.
Step 2: Shape and Chill
Using a scoop or your hands, portion out 12 balls of cookie dough roughly 2 tablespoons each. Place them evenly spaced on cookie sheets lined with silicone baking mats or parchment paper to prevent sticking. To ensure your cookies bake up tender and retain their shape, refrigerate the dough balls for a full 15 minutes. In the meantime, set your oven to preheat at 350 degrees Fahrenheit so it’s ready when your dough is chilled.
Step 3: Bake the Cookies
Once the dough balls have chilled, bake them for about 12 to 14 minutes until they turn a gentle light brown. The wait can feel long, but watching your kitchen fill with that sweet baked-sugar scent is pure joy. After baking, let the cookies cool completely before moving on to decorating—trust me, patience here makes all the difference in the final look and texture.
Step 4: Decorate the Marshmallow Heads
While your cookies are cooling, it’s time to bring those snowmen to life. Using the black edible marker, carefully draw cute eyes and a smiling mouth on each marshmallow. Then use the orange edible marker to dot on the iconic carrot noses. These little faces add all the charm and personality your melted snowmen will be known for. Set the decorated marshmallows aside until you’re ready to assemble.
Step 5: Create the Snow Puddles
Take your cooled cookies and, with the white cookie icing, draw a snow puddle shape right on top. A great tip is to outline the shape first, then fill in the center for even coverage. This creates a lovely snowy base that looks like your snowman is part of a melting patch of winter wonder. The contrast of white icing against the golden cookie makes the design pop.
Step 6: Add the Marshmallow Heads
While the white icing is still wet, gently press one decorated marshmallow onto each cookie, positioning it to one side to look like the snowman’s head has melted sideways into the puddle. Doing this before the icing dries helps secure the marshmallow in place so it won’t slide off later.
Step 7: Final Touches with Icing
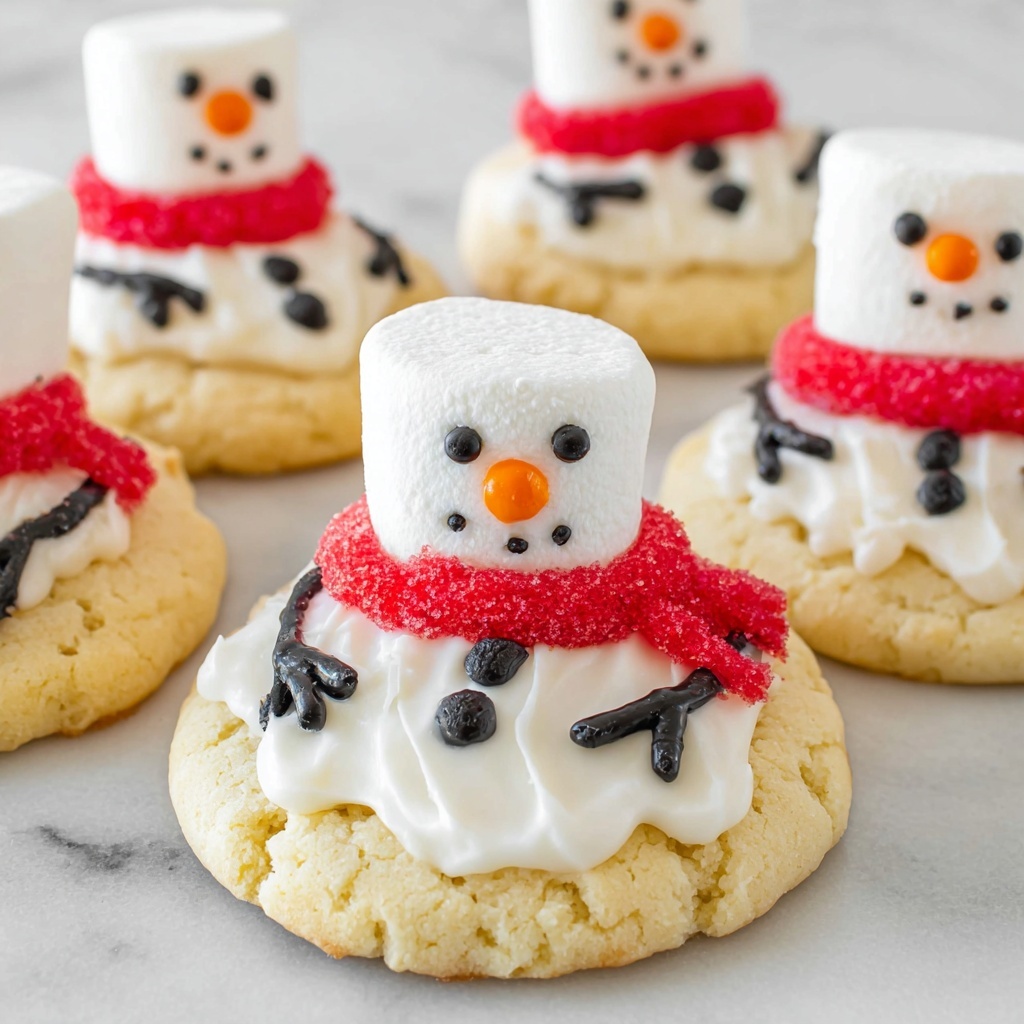
Using the black icing, pipe on little arms reaching out and tiny buttons along the snow puddle. Then, grab the red icing to create festive scarves around the marshmallow necks. These whimsical details transform each cookie into a miniature winter scene full of character and holiday spirit—everyone will admire your artistic touch!
How to Serve Melted Snowman Cookies Recipe
Garnishes
Consider dusting your cookies lightly with powdered sugar to mimic fresh snow or adding small silver or pearl edible beads for buttons and scarf accents. These subtle garnishes elevate the presentation, making your Melted Snowman Cookies Recipe ready for any party table or festive platter.
Side Dishes
These cookies pair beautifully with classic holiday beverages like hot cocoa topped with whipped cream, spicy chai tea, or even a creamy eggnog. For a savory balance, serve alongside a mild cheese board featuring crackers and nuts to complement the sweet, soft textures of your snowmen.
Creative Ways to Present
Turn your cookies into the centerpiece of a gingerbread house display or place them on tiered cake stands surrounded by pine sprigs and cinnamon sticks for an inviting winter wonderland vibe. Wrapping them in clear cellophane tied with festive ribbons also makes gorgeous homemade gifts that friends and family will treasure.
Make Ahead and Storage
Storing Leftovers
Store any leftover Melted Snowman Cookies Recipe in an airtight container at room temperature for up to 3 days to maintain freshness and softness. Keeping the cookies separate from the marshmallows during storage isn’t necessary, but avoid humid spots that could cause the cookies to become soggy.
Freezing
If you want to prepare ahead, freeze the unbaked cookie dough balls wrapped well in plastic wrap and placed in a freezer bag for up to 1 month. When ready to bake, thaw in the refrigerator overnight, then proceed with baking and decorating. Frosted cookies do not freeze well due to the delicate icing and marshmallow decorations.
Reheating
You really won’t need to reheat these cookies, but if you prefer them slightly warm, pop them in the oven at 300 degrees Fahrenheit for just 3-5 minutes. Avoid microwaving as this may melt the marshmallows and ruin the icing details.
FAQs
Can I make these cookies without marshmallows?
While marshmallows are key to the melted snowman look, you could experiment with fondant or candy balls for the heads. However, marshmallows offer the perfect soft texture and surface for edible markers, so they are highly recommended.
What if I don’t have edible markers?
You can use thin brushes and food coloring gel to paint the faces on the marshmallows, or try tiny dots of black and orange icing piped on with a toothpick. Edible markers just make the process easier and more precise.
Can I use homemade sugar cookie dough instead of refrigerator dough?
Absolutely! A classic homemade sugar cookie dough works wonderfully. Just be sure it’s chilled well before baking to help maintain cookie shape and texture like in the Melted Snowman Cookies Recipe.
Will these cookies hold up over time? How long do they last?
These cookies are best enjoyed within a few days for optimal freshness, as the marshmallows can harden and icings may dry out. Proper airtight storage helps extend their shelf life slightly.
Can I customize the scarves or buttons with different icing colors?
Yes! Feel free to get creative with your color choices for scarves, buttons, and arms to match your holiday theme or personal style. The recipe is a wonderful canvas for customization.
Final Thoughts
The Melted Snowman Cookies Recipe is one of those delightful projects that brings a bit of whimsy and warmth to your kitchen, creating treats that are as charming to look at as they are delicious to eat. Whether you’re baking them for a holiday party, a family activity, or just because, these cookies will surely bring smiles and spread joy. Give this recipe a try—you’ll love how easy and fun it is to make your own snowfall magic at home!
Print
Melted Snowman Cookies Recipe
- Prep Time: 20 minutes
- Cook Time: 12 minutes
- Total Time: 32 minutes
- Yield: 12 cookies
- Category: Dessert
- Method: Baking
- Cuisine: American
Description
Melted Snowman Cookies are festive, fun-to-make sugar cookies transformed into adorable ‘melted’ snowmen using marshmallows and colorful icing. These sweet treats feature soft, fluffy sugar cookie bases topped with decorated marshmallows as the snowman heads, enhanced with playful faces drawn with edible markers and bright icing details like scarves and buttons. Perfect for holiday celebrations or winter-themed parties, this easy recipe combines simple baking techniques with creative decorating for a delightful seasonal dessert.
Ingredients
Cookie Dough and Base
- 1 (16.5 ounce) roll refrigerated sugar cookie dough
- 1 large egg yolk
- 1/2 cup all-purpose flour
Decorations
- 12 large marshmallows
- 1 pouch Betty Crocker™ Cookie Icing – white
- 1 pouch Betty Crocker™ Cookie Icing – red
- 1 pouch Betty Crocker™ Cookie Icing – black
- 2 edible markers (black and orange)
Instructions
- Prepare Cookie Dough: Place the refrigerated sugar cookie dough, egg yolk, and all-purpose flour into a large mixing bowl. Using an electric mixer on medium speed, beat the mixture until it becomes smooth and well combined, ensuring an even consistency for the cookies.
- Form Dough Balls and Chill: Scoop out twelve 2-tablespoon-sized balls of cookie dough and arrange them evenly onto cookie sheets lined with silicone baking mats or parchment paper. Place the dough balls into the refrigerator and chill for 15 minutes to help maintain their shape during baking. Meanwhile, preheat your oven to 350°F (175°C).
- Bake the Cookies: Bake the chilled cookie dough balls in the preheated oven for 12 to 14 minutes or until they turn a light brown color on the edges. Once baked, remove them from the oven and set aside to cool completely before starting the decorating process.
- Decorate Marshmallow Faces: Using the black edible marker, carefully draw eyes and a mouth on each of the twelve marshmallows. Then use the orange edible marker to add a carrot-shaped nose to complete the snowman faces. Set the decorated marshmallows aside for assembly.
- Apply White Icing Base: On each cooled cookie, use the white cookie icing to draw the outline of a puddle of melted snow. After outlining, fill in the shape with white icing to create a smooth, snow-like base for the snowman design.
- Attach Marshmallow Heads: While the white icing is still wet and sticky, immediately place one decorated marshmallow to the side of each cookie to represent the snowman’s head, pressing gently to secure in place.
- Add Details with Colored Icing: Using the black cookie icing, pipe arms and buttons onto the icing puddle to give the snowman definition. Then use the red cookie icing to create a scarf around each marshmallow, adding a festive pop of color to your melted snowman cookies.
Notes
- Chilling the dough balls before baking helps prevent spreading and keeps the cookies thick.
- Allow cookies to cool completely before decorating to prevent icing from melting or sliding off.
- Use food-safe edible markers for decorating marshmallows to ensure safety and vibrant colors.
- Customize the scarves and buttons with different colors for a fun variation.
- Store decorated cookies in an airtight container at room temperature for up to 3 days to maintain freshness.
