
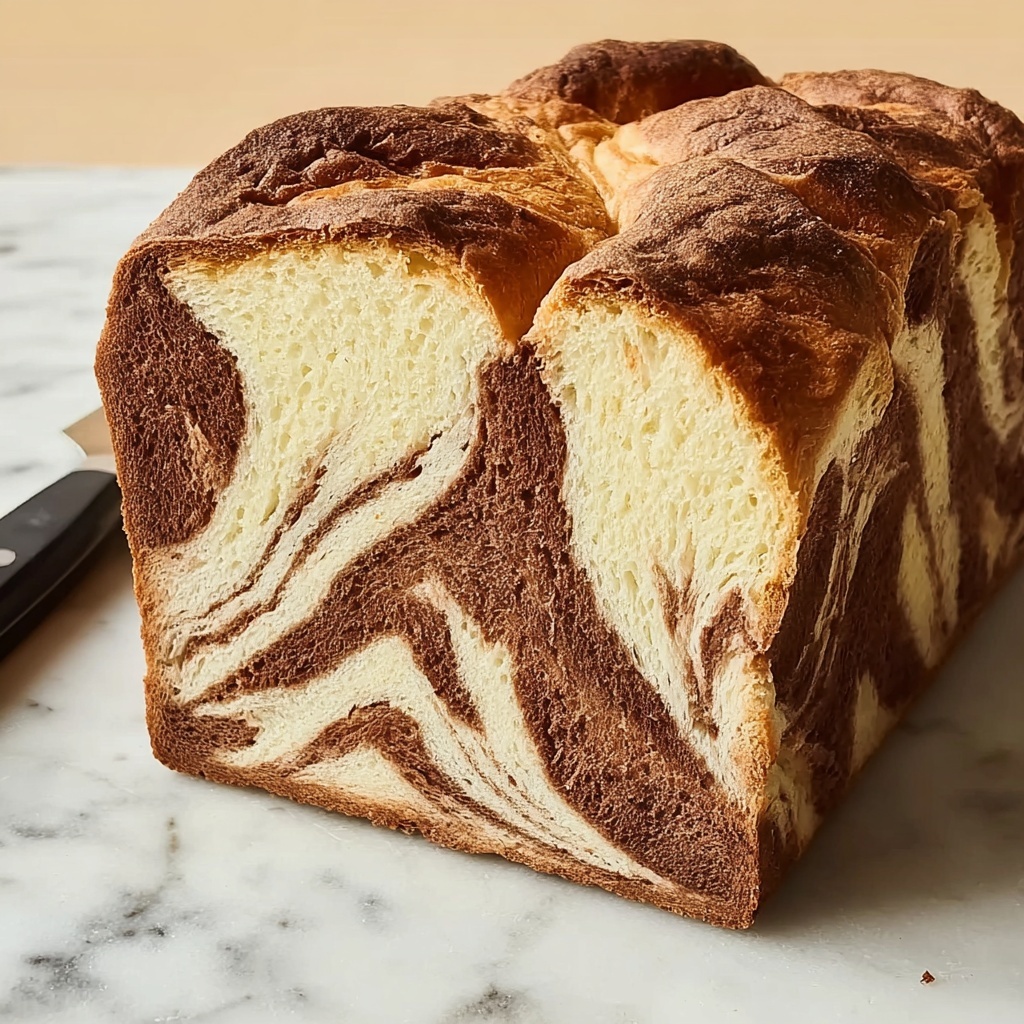
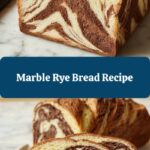
If you have a special place in your heart for hearty, flavorful breads with a bit of visual flair, this Marble Rye Bread Recipe will absolutely steal the show in your kitchen. Imagine the beautiful swirl of light and dark rye doughs, kissed with aromatic caraway seeds and a hint of cocoa that adds just the right depth to the taste. This bread isn’t just a treat for your taste buds; it’s a feast for the eyes, turning every slice into a work of art that’s perfect for sandwiches, toasts, or simply smothered with butter. Whether you’re a seasoned baker or just starting out, this Marble Rye Bread Recipe is an irresistible way to bring a classic deli favorite right to your home.
Ingredients You’ll Need
Making a fantastic Marble Rye Bread Recipe is surprisingly straightforward once you gather the right ingredients. Each component plays a crucial role, from the rye flours that provide the distinctive tang and texture to the molasses and cocoa that contribute rich color and subtle sweetness.
- White rye flour: Provides rye’s signature earthy flavor and hearty crumb.
- Bread flour: Adds gluten structure for a perfect chewy texture.
- Instant yeast: The rising agent that gives the bread its lightness and volume.
- Salt: Enhances flavor and controls yeast activity for balanced dough.
- Caraway seeds: Classic rye bread seasoning, adding aromatic bursts in every bite.
- Honey: Sweetens the light dough gently while softening the crumb.
- Butter, softened: Enriches the dough for tenderness and flavor depth.
- Water, room temperature: Hydrates and activates yeast for perfect dough consistency.
- Molasses: Sweetens and darkens the dough, adding complexity and moisture.
- Unsweetened cocoa powder: Mildly bitter and rich, crucial for the dark dough’s signature marbling color.
- Egg white: Used for an egg wash that creates a shiny, golden crust.
How to Make Marble Rye Bread Recipe
Step 1: Prepare the Light Dough
The magic starts by crafting the light dough separately. By mixing white rye flour, bread flour, instant yeast, salt, and caraway seeds first, you build a flavorful base. Adding honey, softened butter, and water helps create the soft, slightly tacky dough that, once kneaded, becomes smooth and elastic. Achieving that perfect windowpane texture is key here — it means your dough’s gluten structure is spot-on, promising a wonderful chew.
Step 2: Craft the Dark Dough
Next comes the dark dough, where the same dry ingredients come together but with the addition of molasses and unsweetened cocoa powder for that distinctive dark swirl and nuanced taste. Like the light dough, it’s kneaded until soft and elastic, but you may need to adjust the water a bit because the cocoa powder absorbs moisture differently. This little contrast in doughs is the heart of what makes this Marble Rye Bread Recipe visually stunning and irresistibly flavorful.
Step 3: First Rise
After kneading both doughs, place each in their own lightly oiled bowls and cover them with plastic wrap. Setting them in a warm spot allows the yeast to work its magic, doubling the dough’s size within about 1.5 hours. This rise is crucial because it builds flavor and makes the bread wonderfully airy.
Step 4: Divide and Roll
Once risen, gently punch down both doughs and let them rest on floured surfaces. Dividing each dough into two equal pieces sets you up to layer four rectangles of dough later. Rolling each piece into a neat 8×10 inch rectangle is the step where you start shaping that iconic marbled pattern that’s so fun to slice into.
Step 5: Layer and Roll the Log
Lay out your rectangles with alternating colors—light, dark, light, dark—to build the perfect marble effect. Gently rolling the stacked dough ensures the layers stick well and no gaps break up your swirl. Rolling the stack tightly into a log and sealing the ends prepares your dough for its final shape and rise.
Step 6: Final Proof
Place your dough log seam-side down in a greased loaf pan and cover loosely. Let it rise again until nearly doubled, about 60 to 90 minutes, so you get a light, puffy loaf ready to bake. Pressing gently to test springiness tells you when it’s just right for the oven.
Step 7: Prepare and Score
Preheat your oven to 350°F. Brush the loaf with an egg white wash to achieve that perfect shiny crust, then sprinkle caramel seeds on top for that extra classic rye bread aroma. Scoring three diagonal slashes lets the bread expand beautifully while baking, adding to its rustic charm.
Step 8: Bake to Perfection
Bake for 40 to 45 minutes until the crust turns golden brown and the bread reaches an internal temperature of 200°F. If the crust browns too quickly, tenting with foil keeps the loaf from overbaking while ensuring the inside is fully cooked and tender.
Step 9: Cool Before Slicing
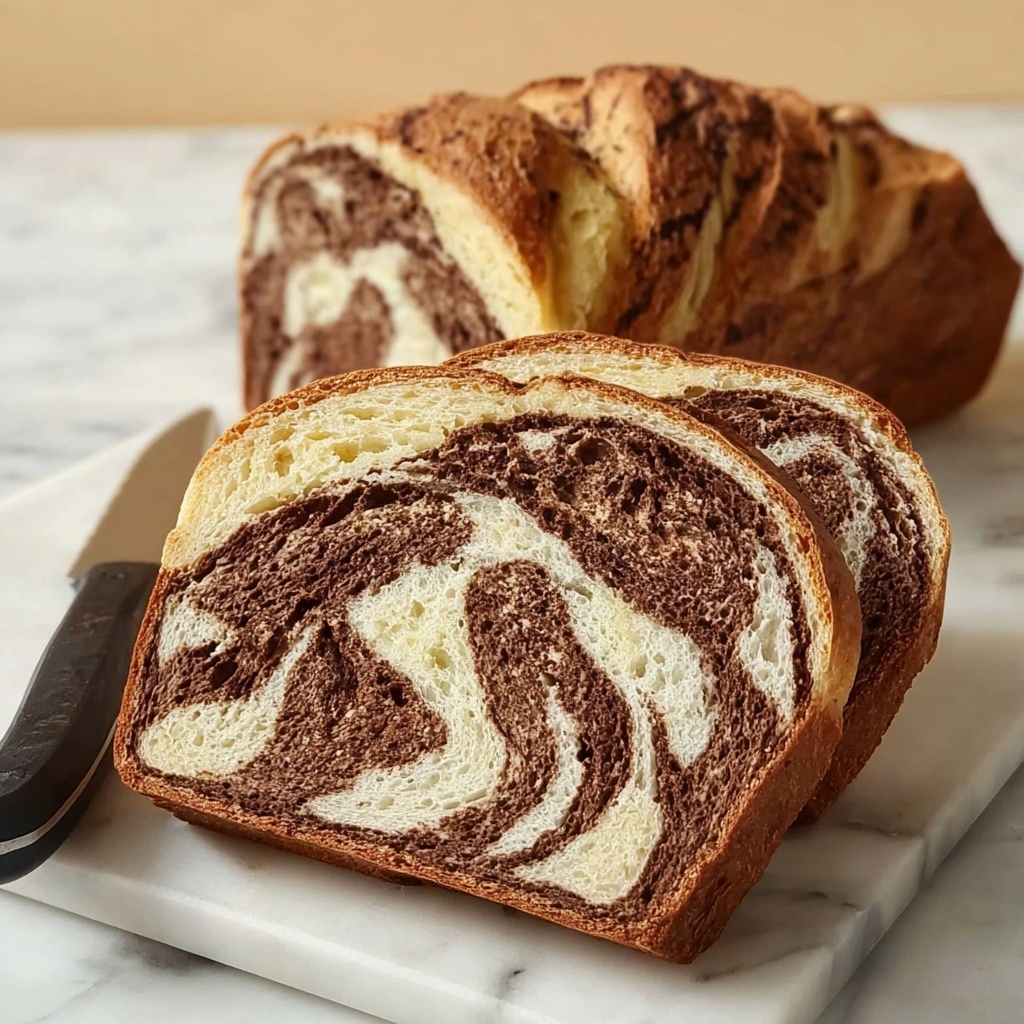
Patience here really pays off. Removing the loaf from the pan and letting it cool completely on a wire rack sets the crumb and keeps the marbling intact, so every slice shows off that beautiful swirl combined with aromatic caraway seeds.
How to Serve Marble Rye Bread Recipe
Garnishes
Marble rye bread shines best with simple garnishes that highlight its flavors. A smear of softened butter or cream cheese works wonders, as does a sprinkle of fresh dill or chives for an extra pop of color and subtle herbal notes.
Side Dishes
This bread pairs beautifully with savory accompaniments like pastrami or smoked salmon sandwiches, sharp cheddar, or even a bowl of hearty borscht. Its robust texture and flavor are fantastic alongside soups and stews, making any meal feel a little more special.
Creative Ways to Present
Turn your marble rye slices into eye-catching toast by topping them with avocado and a poached egg or spreading with hummus and pickled vegetables for a gourmet snack. You can even create elegant open-faced sandwiches or use the bread to frame your favorite charcuterie and cheese boards.
Make Ahead and Storage
Storing Leftovers
Wrap any leftover Marble Rye Bread Recipe tightly in plastic wrap or store it in an airtight container to keep it fresh for up to 3 days. Keeping it at room temperature preserves its crust and crumb best, so avoid the fridge which can dry it out.
Freezing
For longer storage, freezing is a lifesaver. Slice the cooled bread first and freeze the slices in a single layer on a baking sheet, then transfer them to a freezer bag. This way, you can take out just what you need without thawing the whole loaf.
Reheating
To bring your frozen or leftover marble rye back to life, pop slices under a toaster or into a 350°F oven for about 5 minutes. This refreshes the crust and revives the bread’s delightful chew and warmth.
FAQs
Can I use regular rye flour instead of white rye flour?
Yes, you can substitute regular rye flour, but it will make the bread darker and more robust in flavor. White rye flour offers a milder taste and lighter color, perfect for the classic marble effect.
Why does the dough need two different colors?
The two doughs create a stunning swirl pattern that defines marble rye bread visually. The dark dough’s cocoa powder and molasses add rich color and complexity, contrasting beautifully with the lighter dough.
Can I make this bread without a stand mixer?
Absolutely! Kneading by hand takes a bit more elbow grease but allows you to feel the dough’s texture as it develops, which is quite rewarding with this recipe.
What if my dough rises too quickly?
If your dough rises faster than expected, punch it down gently and keep it in a cooler place. Over-proofing can cause the bread to collapse, so keeping an eye on the rise is key.
How do I know when the bread is done baking?
The best way is to check the internal temperature with a thermometer—it should read 200°F. Also, a golden crust and a hollow sound when tapped underneath are great indicators of doneness.
Final Thoughts
This Marble Rye Bread Recipe is a joyful baking adventure that rewards you with a loaf that’s as delicious as it is beautiful. There’s something truly satisfying about pulling that perfectly marbled, caraway-speckled bread from your oven, knowing you made it from scratch. So gather your ingredients, roll up your sleeves, and let this bread become a new favorite in your kitchen and on your table.
Print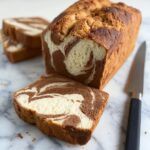
Marble Rye Bread Recipe
- Prep Time: 30 minutes
- Cook Time: 45 minutes
- Total Time: 3 hours 45 minutes
- Yield: 1 loaf (9×5-inch pan)
- Category: Bread
- Method: Baking
- Cuisine: Eastern European
Description
This Marble Rye Bread recipe features a delightful combination of light and dark rye doughs marbled together, offering a compelling pattern and a rich flavor accentuated by caraway seeds and the subtle sweetness of honey and molasses. Perfectly soft with a slightly chewy crust, this homemade bread is an impressive addition to any meal or sandwich.
Ingredients
Light Dough
- 1 1/2 cups white rye flour
- 3 cups bread flour
- 1 3/4 teaspoons instant yeast
- 1 1/2 teaspoons salt
- 1 1/2 teaspoons caraway seeds
- 1 tablespoon honey
- 2 tablespoons butter, softened
- 1 1/4 cups water, room temperature
Dark Dough
- 1 1/2 cups white rye flour
- 3 cups bread flour
- 1 1/4 teaspoons instant yeast
- 1 1/2 teaspoons salt
- 1 1/2 teaspoons caraway seeds
- 1 tablespoon molasses
- 2 tablespoons butter, softened
- 2 tablespoons unsweetened cocoa powder
- 1 1/4 cups water, room temperature
Topping
- 1 egg white
- 1 teaspoon water
- 1 tablespoon caraway seeds
Instructions
- Prepare the Light Dough: In a large bowl or stand mixer, mix white rye flour, bread flour, instant yeast, salt, and caraway seeds. Add honey, softened butter, and 1 cup of water. Stir to form a shaggy dough, then gradually add water until the dough is soft and slightly tacky but not sticky. Knead at low speed for 5 minutes or by hand for 7-8 minutes until the dough is smooth, elastic, and passes the windowpane test.
- Prepare the Dark Dough: In a separate bowl, combine white rye flour, bread flour, instant yeast, salt, and caraway seeds. Add molasses, cocoa powder, softened butter, and 1 cup of water. Knead until soft and slightly tacky, adjusting water as needed due to cocoa powder absorption.
- First Rise: Place each dough in a lightly oiled bowl, turn once to coat, cover with plastic wrap, and let rise in a warm spot until doubled, about 1.5 hours.
- Punch Down and Rest: Punch down both doughs and transfer to lightly floured surfaces. Let rest for 10 minutes to relax the gluten.
- Divide and Roll: Divide each dough into 2 equal pieces (4 pieces total). Roll each piece into an 8×10-inch rectangle.
- Stack and Roll the Loaf: Stack the rectangles alternating light, dark, light, and dark. Gently roll the stack to adhere layers, then roll tightly from the short end into a log, pinching seams and ends closed.
- Second Rise: Place the loaf seam-side down into a greased 9×5-inch loaf pan or parchment-lined baking sheet. Cover loosely with oiled plastic wrap and let rise until nearly doubled, about 60-90 minutes, until puffy and slightly springy.
- Prepare for Baking: Preheat oven to 350°F (175°C) about 30 minutes before baking. Whisk egg white with water and brush the loaf top. Sprinkle remaining caraway seeds, then score three diagonal slashes about ½ inch deep across the loaf.
- Bake the Bread: Bake for 40 to 45 minutes until golden brown and internal temperature reaches 200°F (93°C). Tent with foil if browning too quickly.
- Cool the Bread: Remove from pan and cool on a wire rack for at least 2 hours before slicing to set crumb and preserve marbling.
Notes
- Ensure dough is soft but not sticky for best kneading results.
- The windowpane test checks gluten development—dough should stretch thin without tearing.
- Resting the dough after punch down makes rolling easier.
- Brushing with egg white adds a shiny crust and helps caraway seeds stick.
- Cooling fully before slicing prevents the bread from becoming gummy.
- Tent with foil if the crust browns prematurely to avoid burning.


