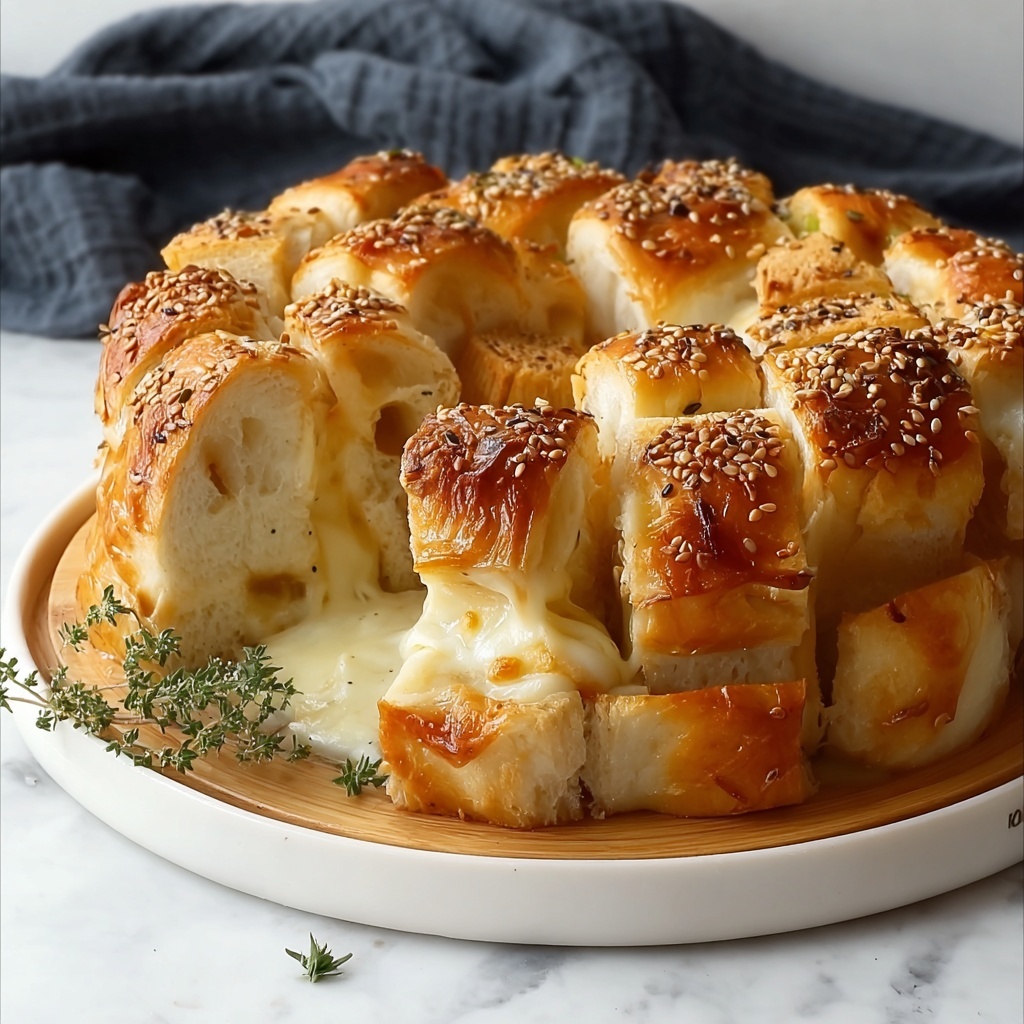
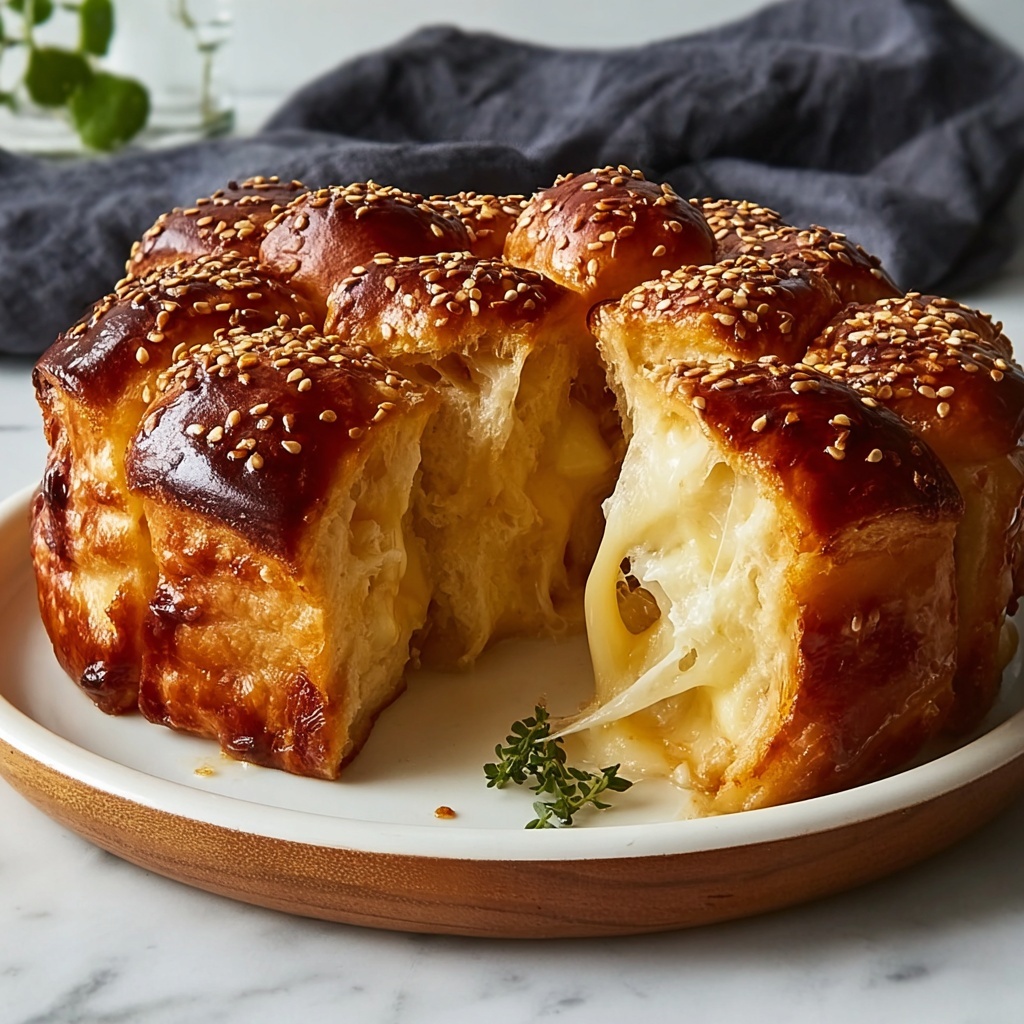
If you have been searching for a show-stopping appetizer or snack to impress your family and friends, the Honeycomb Bread Stuffed with Cheese and Olives Recipe will undoubtedly win hearts at your table. Imagine soft, fluffy bread shaped like a beehive, each bite bursting with gooey mozzarella and the salty pop of olives, all topped with a delightful crunch from toasted sesame seeds. This recipe brings together simple ingredients in a creative way that transforms a humble bread into an irresistible centerpiece, perfect for gatherings or just a comforting treat at home.

Ingredients You’ll Need
These ingredients are straightforward but play a crucial role in creating the perfect balance of flavor and texture. Each element—from the yeast that makes the bread rise beautifully, to the gooey cheese and briny olives—melds to create a dish that is as delicious as it is visually inviting.
- All-Purpose Flour: The base of the dough; a versatile flour that provides structure and softness.
- Water: Warm to activate the yeast, ensuring the bread rises nicely.
- Yeast: Active dry yeast that works its magic to create that airy, fluffy texture.
- Sugar: A small amount that helps the yeast bloom for a perfect rise.
- Salt: Enhances flavor and strengthens the dough’s gluten network for great texture.
- Mozzarella Cheese: Shredded or sticks, it melts into a luscious, creamy filling.
- Pitted Olives: Adds a salty, savory contrast; choose your favorite variety for personal flavor.
- Egg White (optional): Brushed on top for a shiny, golden crust.
- Sesame Seeds: Sprinkled on top to add a nutty crunch and a beautiful finish.
How to Make Honeycomb Bread Stuffed with Cheese and Olives Recipe
Step 1: Activate the Yeast
Start by mixing the warm water, sugar, and yeast in a small bowl. Let it rest around 5 minutes until it becomes frothy and bubbly. This step is crucial because it means the yeast is alive and ready to make your dough rise to fluffy perfection.
Step 2: Prepare the Dough
In a large mixing bowl, combine the flour and salt. Pour in the yeast mixture, and begin kneading until a smooth, elastic dough forms. This might take about 10 minutes of elbow grease, but it’s worth it for that perfect chewy texture. If your hands get sticky, lightly dust with flour to keep it manageable.
Step 3: First Rise
Place the dough in a lightly greased bowl, cover it with a clean cloth or plastic wrap, and set it in a warm spot. Let it rise for 1 to 1.5 hours, or until it doubles in size. This is when the magic happens, as the dough becomes airy and soft, ready to hug the cheesy and olive filling.
Step 4: Form the Filled Dough Balls
Once risen, punch down the dough gently to release any large air bubbles. Divide it into 30 equal pieces and roll each into a smooth ball. Flatten each ball and place a teaspoon of shredded mozzarella along with a few olives in the center. Carefully pinch the dough around the filling to seal it completely so none of the cheesy goodness escapes while baking.
Step 5: Arrange and Brush
Grease a 10-inch baking pan and arrange the balls close together in a honeycomb or beehive pattern. This arrangement creates the signature look, making the dish both beautiful and easy to pull apart. Beat the egg white and brush it gently over the dough balls to give a glossy finish, then sprinkle sesame seeds generously on top for added flavor and eye appeal.
Step 6: Bake to Golden Perfection
Preheat your oven to 350°F (175°C). Bake the bread for 25 to 30 minutes, or until the top turns a rich golden brown. This step seals in the flavors, giving you a stunning, warm, and inviting honeycomb bread stuffed with cheese and olives that’s sure to impress.
How to Serve Honeycomb Bread Stuffed with Cheese and Olives Recipe
Garnishes
A sprinkle of fresh chopped parsley or basil can add a beautiful pop of green and fresh flavor that complements the savory olives and gooey cheese perfectly. For an extra touch, drizzle a little olive oil or balsamic glaze around the plate for dipping.
Side Dishes
This dish pairs wonderfully with a crisp green salad or a bowl of light vegetable soup. The freshness of the sides helps balance the richness of the cheese while keeping the meal harmonious and satisfying.
Creative Ways to Present
You can serve this honeycomb bread on a wooden board with small bowls of your favorite dips such as marinara sauce, tzatziki, or even a spicy harissa. Breaking apart the bread with fingers invites a warm, communal experience that’s both fun and delicious.
Make Ahead and Storage
Storing Leftovers
If you have any leftovers, store them in an airtight container at room temperature for up to 2 days. This keeps the crust soft and the cheese moist and melty when reheated.
Freezing
The honeycomb bread freezes beautifully. Wrap it tightly in plastic wrap and then foil before placing it in the freezer. It can last for up to 1 month without losing its texture or flavor. Thaw overnight in the fridge before reheating.
Reheating
To enjoy the bread fresh, reheat in an oven at 325°F for 10–15 minutes until warmed through. This step refreshes the crust and softness, bringing the cheese back to its delicious melty state without sogginess.
FAQs
Can I use different types of cheese in the Honeycomb Bread Stuffed with Cheese and Olives Recipe?
Absolutely! While mozzarella is perfect for its meltability, you can mix in fontina, cheddar, or even feta for different flavor profiles. Just keep the filling moist and avoid overly watery cheeses.
Is it necessary to use the egg white wash?
Not at all—it is optional but highly recommended because it gives the bread that beautiful shiny golden crust and helps the sesame seeds stick better.
Can this recipe be made gluten-free?
Gluten-free flours can be tricky with yeast breads because of texture differences. You might want to try a gluten-free bread mix designed for yeast to get the best results, but it will require some experimentation.
How do I know when the bread is fully baked?
The bread should be a deep golden brown on top and sound hollow when tapped underneath. If you want extra certainty, you can use a thermometer to check that the internal temperature is about 190°F to 200°F.
Can I add herbs or spices to the dough?
Yes! Adding dried oregano, rosemary, or garlic powder to the dough can enhance the flavor beautifully and complement the cheese and olives for a more savory, fragrant result.
Final Thoughts
The Honeycomb Bread Stuffed with Cheese and Olives Recipe is truly a delightful creation that transforms simple ingredients into a magical, shareable experience. Once you try making it, you’ll find it perfect for any occasion, whether a cozy night in or a party centerpiece. Dive into the process and enjoy every cheesy, olive-studded bite—you won’t regret bringing this unique and delicious bread into your kitchen repertoire!
Print
Honeycomb Bread Stuffed with Cheese and Olives Recipe
- Prep Time: 20 minutes
- Cook Time: 30 minutes
- Total Time: 4 hours (including rising time)
- Yield: 30 servings
- Category: Bread
- Method: Baking
- Cuisine: Mediterranean
Description
Honeycomb Bread Stuffed with Cheese is a delightful baked bread featuring soft, fluffy dough balls stuffed with gooey mozzarella cheese and flavorful olives. Arranged in a beehive pattern and topped with sesame seeds, this recipe offers a perfect combination of texture and savory taste, ideal for sharing as an appetizer or snack.
Ingredients
Dough Ingredients
- 4 cups All-Purpose Flour
- 1.5 cups Warm Water
- 2 teaspoons Active Dry Yeast
- 1 tablespoon Sugar
- 1 teaspoon Salt
Filling and Toppings
- 2 cups Shredded Mozzarella Cheese (or mozzarella sticks)
- 1 cup Pitted Olives (your favorite variety)
- 1 large Egg White (optional, for egg wash)
- 3 tablespoons Sesame Seeds
Instructions
- Activate Yeast: In a small bowl, combine the warm water, sugar, and active dry yeast. Stir gently and let the mixture rest for 5 minutes until it becomes frothy, indicating the yeast is active.
- Prepare the Dough: In a large mixing bowl, mix the all-purpose flour and salt. Add the yeast mixture and stir to combine. Knead the dough on a clean surface for about 10 minutes until it becomes smooth and elastic.
- First Rise: Place the kneaded dough in a greased bowl, cover it with a clean cloth or plastic wrap, and let it rise in a warm place for 1 to 1.5 hours until the dough has doubled in size.
- Divide and Stuff: Punch down the risen dough and divide it into 30 equal pieces. Roll each piece into a smooth ball. Flatten each ball slightly, place about 1 teaspoon of shredded mozzarella and a few olives in the center, then pinch the dough closed to seal the filling inside.
- Arrange in Pan: Grease a 10-inch baking pan. Arrange the stuffed dough balls closely together in the pan, forming a beehive or honeycomb shape.
- Egg Wash and Seeds: Beat the egg white lightly and brush it over the surface of the dough balls. This will create a glossy finish when baked. Sprinkle the sesame seeds evenly on top.
- Bake: Preheat your oven to 350°F (175°C). Bake the assembled bread for 25 to 30 minutes, until the surface is golden brown and the bread sounds hollow when tapped.
Notes
- Use warm water (around 110°F or 43°C) to properly activate the yeast without killing it.
- Ensure to seal the dough well around the cheese and olives to prevent leakage during baking.
- You can substitute mozzarella with other melting cheeses like cheddar or gouda for different flavors.
- For a vegan option, replace egg white with a plant-based milk wash or skip it entirely and use a drizzle of olive oil.
- Let the bread cool slightly before serving to allow the cheese filling to set slightly, reducing burn risk.


