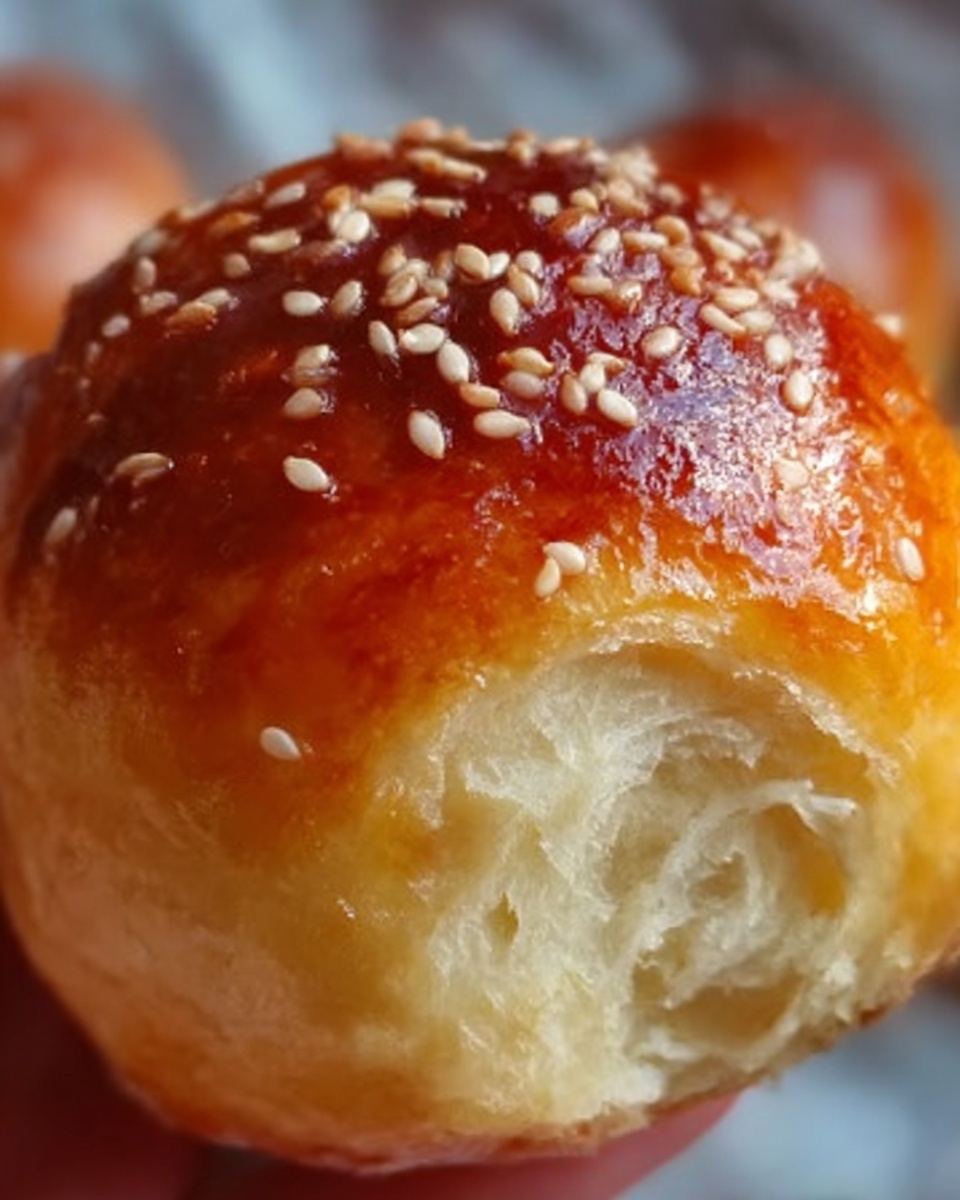
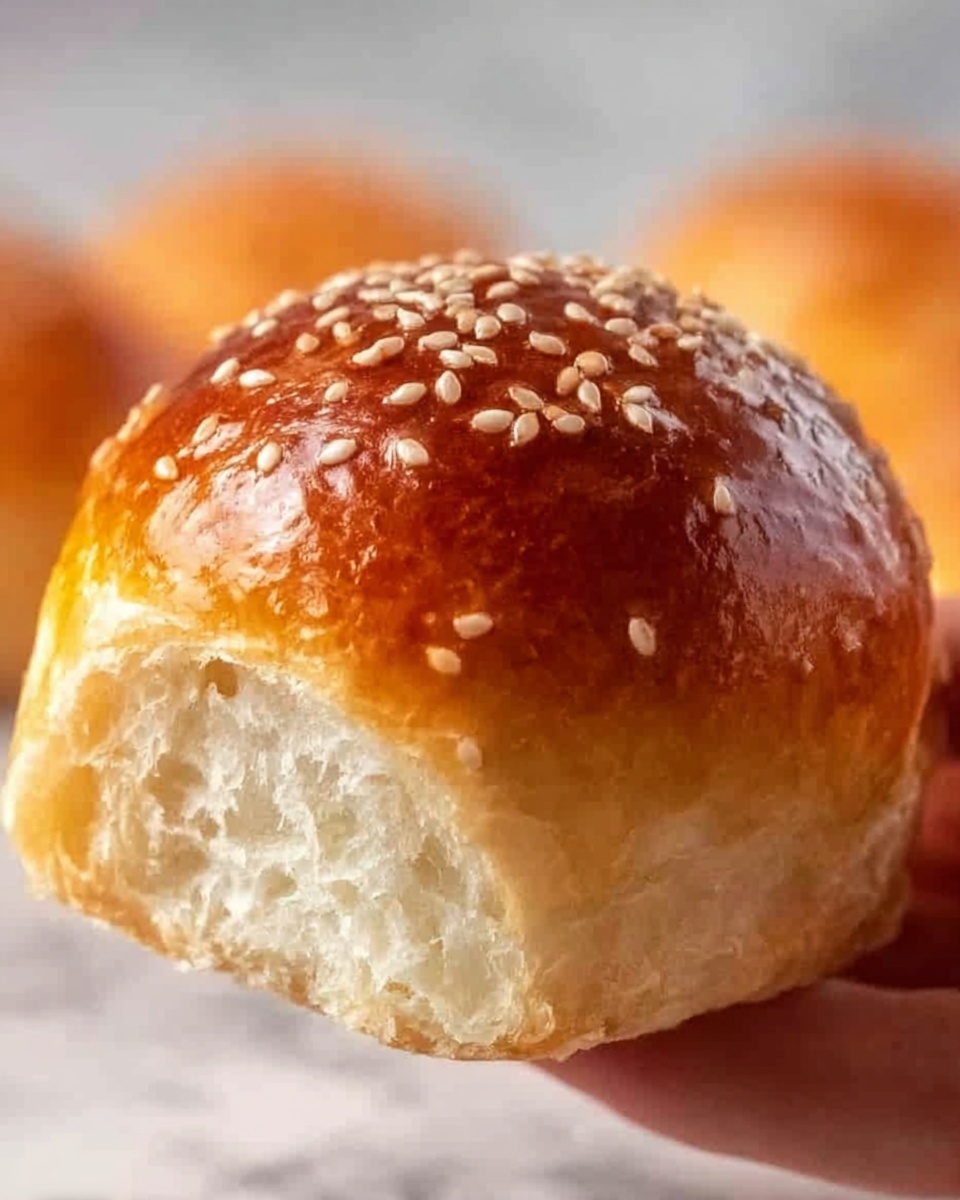
If you’ve ever dreamed of sinking your teeth into pillowy, golden rolls fresh from the oven, you’re in for a real treat with this Soft and Buttery Homemade Rolls Recipe. These rolls are tender, fluffy, and packed with rich buttery goodness that melts in your mouth. Whether you’re serving them alongside a hearty meal or enjoying them as a snack, these homemade rolls deliver a comforting warmth and irresistible flavor that will quickly make them family favorites. Plus, the step-by-step process is approachable and rewarding, perfect for sharing the baking joy with your loved ones.
Ingredients You’ll Need
This Soft and Buttery Homemade Rolls Recipe calls for simple, everyday ingredients that come together beautifully to create rolls with a perfect texture and mouthwatering flavor. Each ingredient plays a specific role in ensuring your rolls rise well, stay soft, and have that lovely golden color.
- Warm milk (1 cup, 110°F/45°C): Activates the yeast and adds moisture to keep rolls tender.
- Sugar (1/4 cup): Feeds the yeast and adds subtle sweetness to balance the buttery richness.
- Active dry yeast (2 1/4 teaspoons or 1 packet): The magic that makes your dough rise and become airy.
- Unsalted butter (1/4 cup melted + 2 tablespoons for brushing): Adds that signature buttery flavor and soft crumb.
- Salt (1 teaspoon): Enhances all the flavors and balances the sweetness.
- Egg (1): Gives the rolls structure and a slightly richer texture.
- All-purpose flour (3 1/2 cups plus extra for dusting): Provides the foundation of your rolls—structure and chewiness.
How to Make Soft and Buttery Homemade Rolls Recipe
Step 1: Activate the Yeast
Begin by stirring sugar into warm milk until it dissolves completely. Sprinkle the yeast on top and give it 5 to 10 minutes to bloom. You’ll know it’s ready when it’s frothy and bubbly—this is how you achieve those perfectly risen rolls.
Step 2: Mix Wet Ingredients
In a large bowl, whisk together melted butter, salt, and the egg. Then, pour in your foamy yeast mixture. Combining these ingredients ensures that the yeast gets evenly distributed for a consistent rise.
Step 3: Add the Flour and Knead
Add the flour gradually, about half a cup at a time, stirring as you go until the dough starts pulling away from the sides of the bowl. Turn it out onto a floured surface and knead for 5 to 7 minutes until it becomes smooth and elastic—the texture you want before letting it rest.
Step 4: First Rise
Place the dough in a lightly oiled bowl, cover with a damp cloth, and find a warm spot for it to double in size. This usually takes about 1 to 1.5 hours. This first rise is critical to get your rolls light and fluffy.
Step 5: Shape the Rolls
After the dough has risen, punch it down to release the air. Divide it into 12 equal pieces and shape each into a smooth ball. Arrange these balls evenly in a greased 9×13-inch baking dish, setting the stage for the rolls to rise again.
Step 6: Second Rise
Cover the dish loosely and let the rolls rise for another 30 minutes, allowing them to puff up and become even softer. This second rise is essential for that melt-in-your-mouth texture.
Step 7: Bake to Golden Perfection
Preheat your oven to 350°F (175°C). Bake the rolls for 18 to 22 minutes, until the tops are beautifully golden brown. The smell during baking is absolutely irresistible and one of the best parts of this recipe!
Step 8: Optional Buttery Finish
While the rolls are still warm, brush them with melted butter for an extra glistening, soft finish. This step makes them shine and boosts that buttery flavor, taking your rolls from delightful to divine.
Step 9: Cool Slightly and Enjoy
Allow your Soft and Buttery Homemade Rolls to cool just a bit before serving. They’re perfect warm—soft inside with a slightly crisp exterior that will have everyone asking for seconds.
How to Serve Soft and Buttery Homemade Rolls Recipe

Garnishes
Simple garnishes like a sprinkle of flaky sea salt, a dusting of fresh herbs such as rosemary or thyme, or even a drizzle of honey butter can elevate these soft rolls into a stunning side. These touches add flavor layers without overpowering the buttery essence.
Side Dishes
These rolls pair beautifully with everything from comforting soups and stews to hearty roasts and fresh salads. Their mild richness complements both casual family dinners and festive holiday spreads, making them incredibly versatile.
Creative Ways to Present
For a fun twist, slice the rolls and use them for sliders or small sandwiches filled with your favorite proteins and cheeses. You can also hollow out the center slightly and fill with warm spinach dip or creamy chicken salad for delightful appetizers everyone will love.
Make Ahead and Storage
Storing Leftovers
If you have any leftovers (though that’s rare with these rolls!), store them in an airtight container at room temperature for up to 2 days to keep them soft and fresh. You can also wrap them tightly in foil if you want to preserve that buttery texture.
Freezing
To freeze, let the rolls cool completely, then place them in a freezer-safe bag or container. They freeze wonderfully for up to 3 months, making them a perfect make-ahead treat for busy days or unexpected guests.
Reheating
Reheat frozen rolls by wrapping them in foil and warming in the oven at 350°F (175°C) for about 10 to 15 minutes. Alternatively, microwave them covered with a damp paper towel for 20-30 seconds to gently revive their softness.
FAQs
Can I use whole milk instead of warm milk?
Absolutely! Whole milk works perfectly for this recipe and gives the rolls a slightly richer taste. Just make sure it’s warmed to about 110°F so it activates the yeast properly.
What if my dough doesn’t rise?
If your dough isn’t rising, it might be due to the yeast being old or the milk temperature being too hot or cold. Always check that your yeast is fresh and that your milk is warm but not hot to the touch.
Can I make these rolls without eggs?
While eggs add richness and structure, you can substitute with a flax egg or omit it altogether, though the texture may be slightly less tender. Experimenting with substitutes can still yield tasty results!
How do I keep the rolls soft longer?
Brushing the baked rolls with melted butter and storing them in an airtight container helps retain their softness. Avoid refrigerating as it can dry them out faster.
Can I add herbs or cheese to the dough?
Definitely! Adding chopped herbs like chives or parsley, or mixing in shredded cheese, can turn these classic rolls into flavorful variations. Just fold them in during the kneading process.
Final Thoughts
Once you try this Soft and Buttery Homemade Rolls Recipe, there’s no going back to store-bought rolls. The joy of crafting these tender, luscious rolls from scratch and sharing them fresh from your oven is unparalleled. They bring such warmth and comfort to any meal and make every bite feel special. So don’t hesitate—roll up your sleeves and bake a batch that will have everyone coming back for more.
Print
Soft and Buttery Homemade Rolls Recipe
- Prep Time: 15 minutes
- Cook Time: 22 minutes
- Total Time: 1 hour 52 minutes
- Yield: 12 rolls
- Category: Bread
- Method: Baking
- Cuisine: American
Description
These Soft and Buttery Homemade Rolls are tender, fluffy, and perfect for any meal. Made from scratch with simple ingredients like warm milk, yeast, butter, and flour, they come together with an easy rise and bake method to create the perfect golden brown, melt-in-your-mouth dinner rolls.
Ingredients
Wet Ingredients
- 1 cup warm milk (110°F/45°C)
- 1/4 cup sugar
- 1/4 cup unsalted butter, melted
- 1 egg
Dry Ingredients
- 2 1/4 teaspoons active dry yeast (1 packet)
- 1 teaspoon salt
- 3 1/2 cups all-purpose flour (plus extra for dusting)
Optional
- 2 tablespoons unsalted butter, for brushing
Instructions
- Activate the Yeast: In a small bowl, combine warm milk and sugar. Stir until the sugar dissolves. Sprinkle the active dry yeast over the top and let it stand for 5-10 minutes until frothy and bubbly, indicating the yeast is active.
- Mix Wet Ingredients: In a large mixing bowl, mix together the melted butter, salt, and egg. Next, add the frothy yeast mixture and stir until combined thoroughly.
- Add Flour and Knead: Gradually incorporate the all-purpose flour, about 1/2 cup at a time, stirring until a dough forms that begins to pull away from the sides of the bowl. Transfer to a floured surface and knead for 5-7 minutes until the dough becomes smooth and elastic.
- First Rise: Place the kneaded dough into a lightly oiled bowl and cover it with a damp cloth. Let it rise in a warm area for 1 to 1.5 hours, or until the dough doubles in size.
- Preheat Oven: Preheat your oven to 350°F (175°C) while the dough rises for the second time.
- Shape Rolls: Punch down the risen dough and divide it into 12 equal portions. Shape each piece into a smooth ball and arrange them evenly in a greased 9×13-inch baking dish.
- Second Rise: Cover the rolls with a clean cloth and allow them to rise again for about 30 minutes, until doubled in size.
- Bake Rolls: Place the baking dish in the preheated oven and bake for 18-22 minutes or until the rolls turn golden brown on top.
- Optional Butter Brush: For a soft, glossy finish, brush the hot rolls with melted butter immediately after removing them from the oven.
- Cool and Serve: Let the rolls cool slightly before serving. Enjoy them warm for the best texture and flavor.
Notes
- Ensure your milk is warm but not hot to avoid killing the yeast.
- Kneading is crucial for developing gluten which gives the rolls their soft, chewy texture.
- You can add herbs or garlic to the dough for flavored rolls.
- These rolls freeze well; store in an airtight container once cooled.
- Brush with butter right after baking for an extra soft crust.


