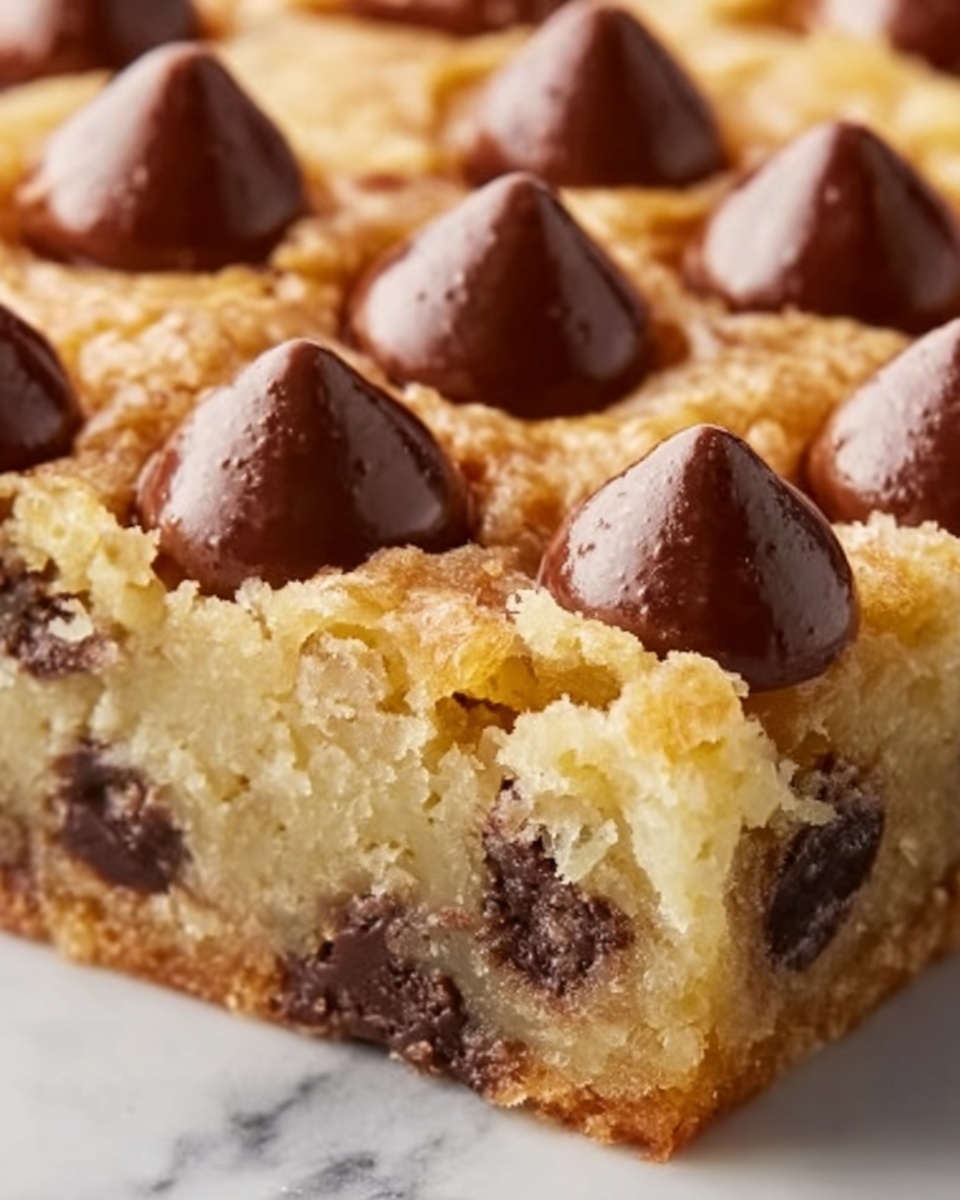
If you have a sweet tooth that craves a rich, buttery filling with the delightful surprise of melted chocolate, then you’re in for a treat with this Chocolate Chip Butter Tart Pie Recipe. This classic Canadian-inspired dessert combines the gooey, caramel-like sweetness of butter tarts with the irresistible texture of a crisp pie crust and chocolate chips swirling in every bite. Whether you’re baking for a family gathering or just because you deserve a special indulgence, this pie brings that perfect balance of nostalgia and chocolatey goodness in one slice.
Ingredients You’ll Need
Gathering these simple yet essential ingredients makes your Chocolate Chip Butter Tart Pie Recipe come alive. Every component plays a key role—ensuring a flaky crust, a luscious filling, and that melt-in-your-mouth chocolate sensation.
- Pre-made pie crust: Saves time but still offers that perfectly crisp base; use homemade if you prefer extra freshness.
- Brown sugar (1 cup packed): Adds deep caramel notes and sweetness that define the butter tart filling.
- Unsalted butter (1/2 cup, melted): Creates the rich, creamy texture essential for the filling’s decadence.
- Large eggs (2): Provide structure and help bind the filling ingredients together smooth and firm.
- All-purpose flour (2 tablespoons): Slightly thickens the filling to give it that just-set consistency.
- Vanilla extract (1 tablespoon): Amp up the warmth and depth of flavor in the filling.
- Salt (1/4 teaspoon): Balances sweetness and enhances all other flavors perfectly.
- Chocolate chips (1 cup): Choose semi-sweet or milk depending on how sweet or slightly bittersweet you want this pie.
- Chopped pecans or walnuts (1/2 cup, optional): Adds a wonderful crunch and nuttiness that complements the smooth filling.
How to Make Chocolate Chip Butter Tart Pie Recipe
Step 1: Prepare Your Pie Crust
Start by preheating your oven to 350°F (175°C). If you’re using a pre-made crust, set it gently into your pie dish and prick the bottom with a fork to prevent bubbling during baking. Partial blind baking for about 8 minutes helps prevent a soggy bottom once the filling goes in.
Step 2: Mix the Filling
In a medium bowl, whisk together the brown sugar, melted butter, eggs, flour, vanilla extract, and salt until smooth and well combined. This luscious mixture forms the foundation of your rich filling.
Step 3: Add Chocolate Chips and Nuts
Gently fold in the chocolate chips and optional chopped nuts, making sure they are evenly distributed throughout the filling. This ensures that every slice of this Chocolate Chip Butter Tart Pie Recipe has pockets of gooey chocolate and nutty bites.
Step 4: Pour Filling Into Crust and Bake
Carefully pour the filling mixture into your partially baked pie crust. Place the pie in the preheated oven and bake for about 25 to 30 minutes, or until the filling is just set with a slight wobble in the center. Avoid overbaking to keep that signature sticky, soft texture.
Step 5: Cool and Set
Remove the pie from the oven and allow it to cool at room temperature before slicing. This step lets the filling firm up slightly so your slices hold together beautifully and the flavors mellow into perfection.
How to Serve Chocolate Chip Butter Tart Pie Recipe

Garnishes
For an inviting presentation, dust the top of your pie with a light sprinkle of powdered sugar or add a dollop of whipped cream. A few extra chocolate chips or chopped nuts scattered on top also add visual appeal and texture.
Side Dishes
This pie pairs wonderfully with a scoop of vanilla ice cream or a drizzle of caramel sauce. Fresh berries on the side add a pop of color and a hint of natural tartness that balances the sweet richness perfectly.
Creative Ways to Present
Turn your Chocolate Chip Butter Tart Pie Recipe into an irresistible dessert centerpiece by serving slices on decorative plates with edible flowers or adding a small sprig of mint. For parties, consider mini tartlets using the same filling for bite-sized indulgence.
Make Ahead and Storage
Storing Leftovers
Store any leftover pie covered loosely with plastic wrap or in an airtight container at room temperature for up to two days. This keeps the crust from becoming too soggy while maintaining the filling’s gooey goodness.
Freezing
You can freeze the pie wrapped tightly in plastic wrap and aluminum foil for up to two months. Thaw it overnight in the fridge before serving to retain the delicious texture and flavor.
Reheating
To enjoy it warm, reheat slices in a low oven (around 300°F) for 10 to 15 minutes or pop into the microwave for 20 to 30 seconds. This brings back that melty chocolate and tender filling effortlessly.
FAQs
Can I use a homemade pie crust for this recipe?
Absolutely! Homemade crust adds a personal touch and can enhance the flavor and texture. Just make sure it’s well chilled before baking.
Do I have to add nuts to the Chocolate Chip Butter Tart Pie Recipe?
Not at all. Nuts are optional and can be omitted if you prefer a smoother filling or have allergies.
What type of chocolate chips work best?
Semi-sweet chocolate chips provide a nice balance of sweetness, but feel free to use milk chocolate for a creamier sweetness or even dark chocolate for a richer contrast.
Can this pie be made ahead of time?
Yes, this pie actually tastes even better the next day once the flavors have melded together. Just store it properly as mentioned.
How do I prevent the crust from becoming soggy?
Blind baking the crust slightly before adding the filling helps keep it crisp and prevents sogginess from the buttery filling.
Final Thoughts
This Chocolate Chip Butter Tart Pie Recipe is a winner every time, bringing together the best of buttery sweetness and chocolatey delight in one unforgettable dessert. Whether you’re sharing it with loved ones or indulging yourself, this pie promises smiles and happy taste buds with every bite. So go ahead and give it a try — your oven and your sweet tooth will thank you.
Print
Chocolate Chip Butter Tart Pie Recipe
- Prep Time: 15 minutes
- Cook Time: 50 minutes
- Total Time: 1 hour 5 minutes
- Yield: 8 servings
- Category: Dessert
- Method: Baking
- Cuisine: Canadian
Description
This Chocolate Chip Butter Tart Pie is a delicious twist on the classic Canadian butter tart, featuring a rich, gooey filling loaded with chocolate chips and nuts in a buttery pie crust. Perfect for dessert lovers who enjoy a sweet, melt-in-your-mouth treat with a delightful combination of textures and flavors.
Ingredients
Pie Crust
- 1 pre-made pie crust (or homemade, if preferred)
Filling
- 1 cup packed brown sugar
- 1/2 cup unsalted butter, melted
- 2 large eggs
- 2 tablespoons all-purpose flour
- 1 tablespoon vanilla extract
- 1/4 teaspoon salt
- 1 cup chocolate chips (semi-sweet or milk, your preference)
- 1/2 cup chopped pecans or walnuts (optional)
Instructions
- Prepare the oven and pie crust: Preheat your oven to 350°F (175°C). If using a pre-made pie crust, place it into a 9-inch pie pan and press gently to fit. If making homemade crust, roll out and fit into the pie pan.
- Mix the filling ingredients: In a large bowl, combine the packed brown sugar and melted butter. Stir until smooth. Add the eggs, one at a time, beating well after each addition. Then add the all-purpose flour, vanilla extract, and salt, mixing until fully incorporated.
- Add chocolate chips and nuts: Fold in the chocolate chips and chopped pecans or walnuts if using. Ensure that they are evenly distributed throughout the filling.
- Pour filling into crust: Pour the prepared filling mixture into the pie crust, spreading evenly to fill the pan.
- Bake the pie: Place the pie in the preheated oven and bake for about 45 to 50 minutes, or until the filling is set but still slightly gooey in the center. The crust should be golden brown on the edges.
- Cool and serve: Remove the pie from the oven and allow it to cool on a wire rack for at least 1 hour before slicing. This helps the filling to set properly. Serve at room temperature or slightly warm for the best flavor.
Notes
- Use a pie shield or foil on the crust edges if they brown too quickly during baking.
- For a nut-free version, simply omit the nuts without affecting the overall flavor.
- Brown sugar packed tightly ensures the right sweetness and texture in the filling.
- Letting the pie cool thoroughly is key to achieving the classic gooey texture of butter tarts.

