
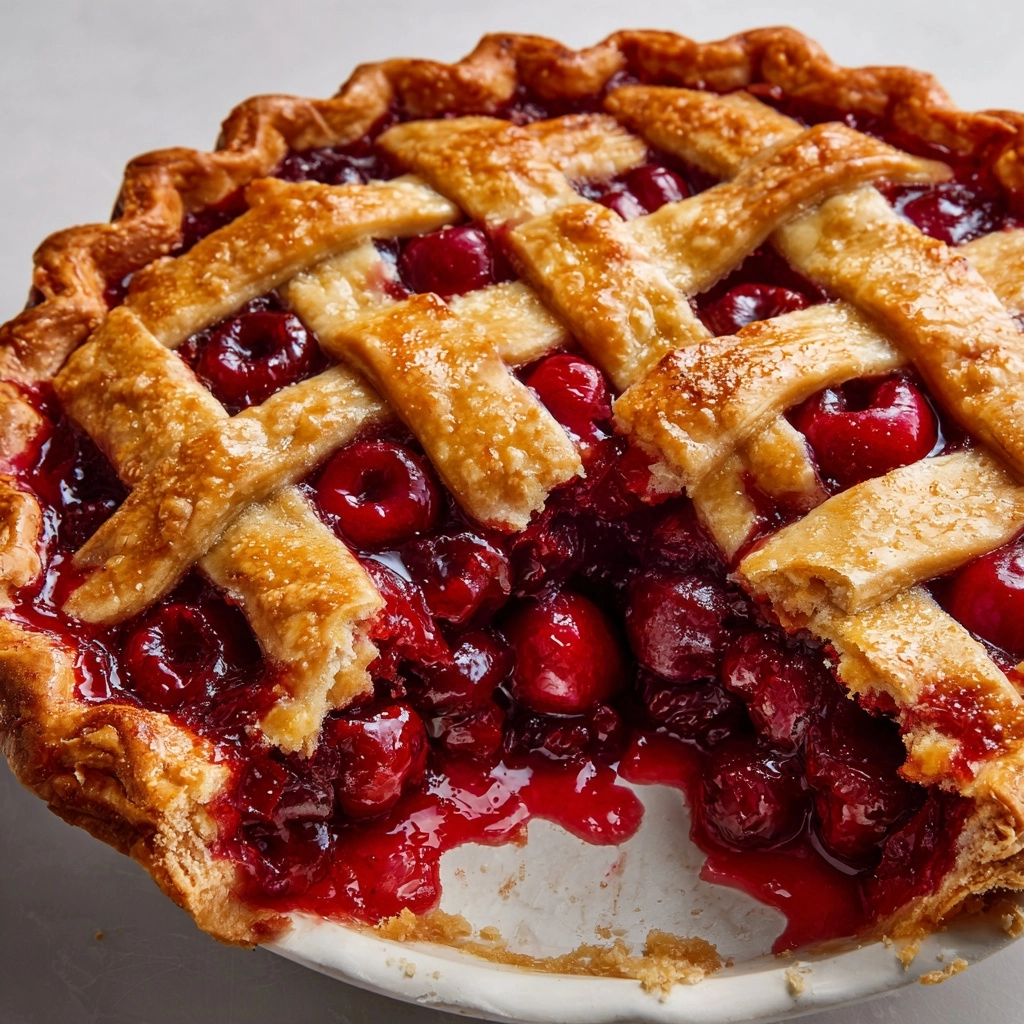
There’s something undeniably special about serving up a slice of Homemade Cherry Pie. With its buttery, flaky crust and ruby-red, gently tart cherry filling, this classic dessert has a way of stealing the show at any gathering, picnic, or just a cozy night in. The medley of sweet, tangy, and nutty flavors—plus the irresistible aroma as it bakes—makes this pie the kind of treat everyone wants another piece of. Making it from scratch (with a little help from refrigerated crusts) means you get all the comfort and nostalgia of grandma’s recipe, but with the ease of a modern shortcut. Grab your pie dish, and let’s create some joyful memories, one delicious slice at a time!
Ingredients You’ll Need
Each component of this Homemade Cherry Pie plays a key role in creating big flavor and perfect texture. These kitchen staples combine in a way that feels both simple and celebratory—no fancy tools or complicated ingredients here, just pure pie happiness.
- Tart Cherries (2 cans, 14.5 ounces each, drained): The star of the show, these bring vibrant color and that signature tangy flavor.
- Granulated Sugar (1 cup): Balances out the tartness of the cherries for sweet perfection.
- Cornstarch (1/4 cup): The magic thickener that gives the filling a luscious, sliceable consistency.
- Almond Extract (1/4 teaspoon): Just a hint adds warmth and depth—don’t skip this tiny but mighty ingredient!
- Lemon Juice (1 tablespoon): Brightens the flavor and enhances the natural fruitiness of the cherries.
- Salt (1/8 teaspoon): A pinch ties everything together and sharpens every bite.
- Butter (2 tablespoons, cut up): Melts into the filling while baking for extra richness.
- Refrigerated Pie Crusts (2 count): Convenient and reliably flaky—your shortcut to pie bliss.
- Milk (1 tablespoon, for brushing): Helps give the crust a golden, glossy finish.
- Coarse Sugar (1 tablespoon, optional): Sprinkled on top for a sparkly, sweet crunch.
How to Make Homemade Cherry Pie
Step 1: Prepare the Cherry Filling
Start by adding the drained tart cherries, sugar, cornstarch, almond extract, lemon juice, and salt into a medium saucepan. Turn the heat to medium and stir constantly—soon, you’ll watch this mixture transform as it thickens and begins to bubble, which takes about 5 to 7 minutes. Once it’s glossy and just thick enough to coat your spoon, remove it from the heat and let it cool slightly while you get your crust ready. (Trust me, your kitchen already smells incredible!)
Step 2: Roll Out the Pie Crust
Unroll one of your refrigerated pie crusts and ease it into a 9-inch pie dish, gently pressing it to fit the bottom and sides. Don’t worry if it’s not perfect—imperfections just say “homemade with love.”
Step 3: Fill the Pie
Spoon your slightly cooled cherry filling into the prepared pie crust. Dot the top evenly with the small cubes of butter. The butter melts as the pie bakes, swirling extra flavor into every layer of fruit.
Step 4: Top with Second Crust
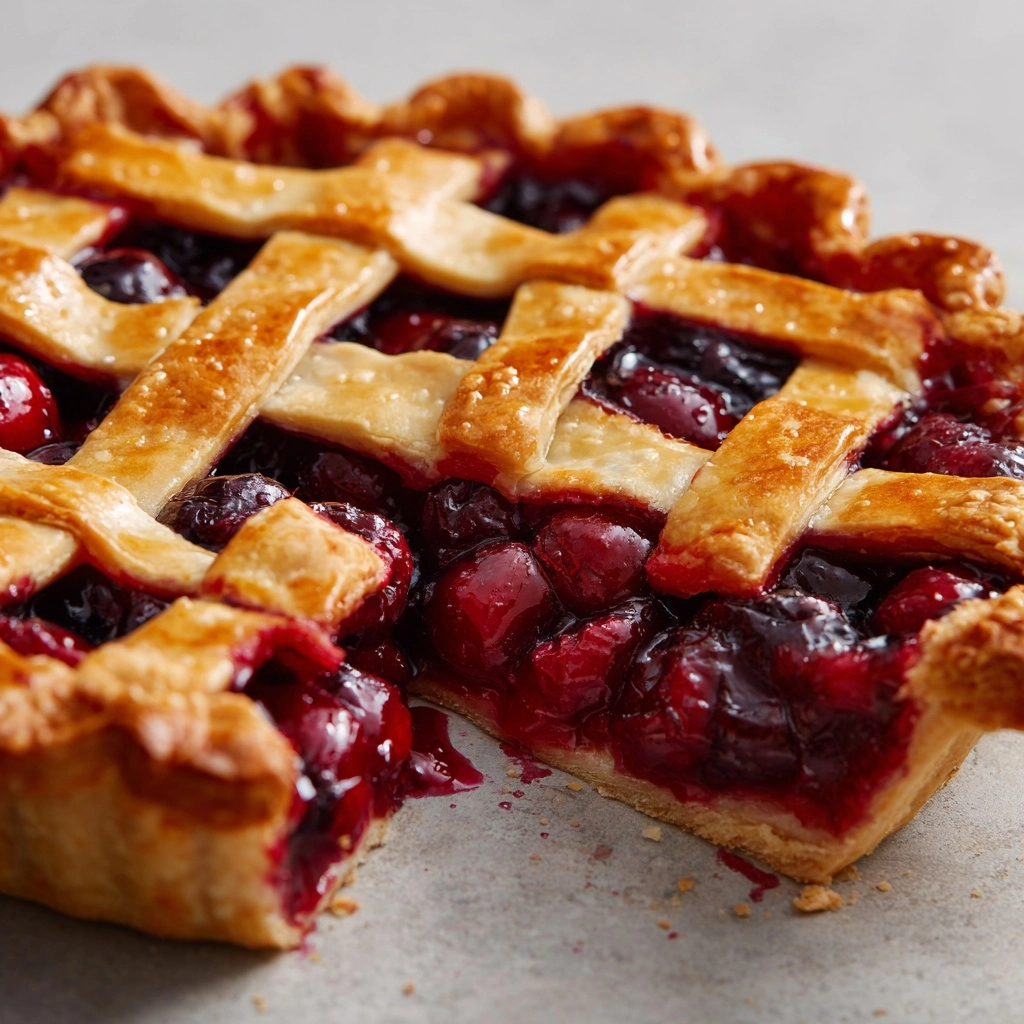
Roll out the second pie crust and place it over the cherry filling. For a traditional finish, seal and crimp the edges. Or, show off a little with a lattice: cut the crust into strips and weave them for a beautiful, bakery-style touch. Either way, this is where the magic happens!
Step 5: Add the Finishing Touches
Brush the top crust with milk so it bakes up shiny and golden. If you love an extra pop of texture, sprinkle on that coarse sugar for sparkle and crunch. These little details are what make a Homemade Cherry Pie really shine.
Step 6: Bake the Pie
Pop your assembled pie onto a baking sheet (to catch any juices) and slide it into a preheated 425°F (220°C) oven. Bake for 40 to 45 minutes, watching for that irresistible golden crust and bubbly filling peeking through. If the edge browns faster than the top, just cover it with foil. After baking, let your pie cool for at least 2 hours; this helps the filling set so slicing is a breeze.
How to Serve Homemade Cherry Pie
Garnishes
Homemade Cherry Pie doesn’t need much to look irresistible, but a scoop of creamy vanilla ice cream or a dollop of softly whipped cream takes it over the top. A light dusting of powdered sugar or a few extra fresh cherries add a little flair for special occasions.
Side Dishes
If you’re planning a full dessert spread, serve your pie with a crisp fruit salad or a glass of cold milk or iced coffee. The sweet-tart filling perfectly balances creamy or mildly sweet sides.
Creative Ways to Present
Try cutting the pie into mini slices for a dessert platter, or serve warm in shallow bowls topped with ice cream for a pie-ala-mode vibe. For a festive gathering, offer guests individual “pie cups” by baking the cherry filling in ramekins topped with pie crust squares.
Make Ahead and Storage
Storing Leftovers
Store any leftover Homemade Cherry Pie loosely covered at room temperature for up to one day. If you have any remaining after that (which is a big “if!”), refrigerate for up to three more days to keep the crust crisp and the filling fresh.
Freezing
Homemade Cherry Pie freezes beautifully. First, cool the pie completely. Wrap tightly in several layers of plastic wrap and then foil. Store in the freezer for up to three months. For individual slices, wrap each piece and pop them in a freezer bag for future treats.
Reheating
To enjoy your leftover pie warm, reheat slices in a 300°F oven for 10 to 15 minutes until just heated through. This keeps the crust nice and crisp, and the filling perfectly gooey—just like fresh-baked!
FAQs
Can I use fresh or frozen cherries instead of canned?
Absolutely! Just pit and measure out an equal amount of fresh or frozen tart cherries. If using frozen, thaw and drain first, then proceed with the recipe as written.
How do I prevent the bottom crust from getting soggy?
Using cornstarch in the filling helps a lot, but you can also sprinkle a thin layer of ground almonds or breadcrumbs on the bottom crust before adding the filling. Preheating your baking sheet adds a little extra insurance for a crisp bottom too!
What’s the best way to create a beautiful lattice crust?
Roll out your top crust and slice it into even strips (about 1/2 inch wide). Lay half the strips vertically, then weave the other half horizontally, lifting strips as needed to create that classic woven look. Have fun with it—no need for perfection!
Can I make this pie ahead of time?
Yes, Homemade Cherry Pie can be made a day in advance—just let it cool, then store at room temperature, lightly covered, so it stays crisp and fresh for serving.
Is this recipe suitable for vegetarians?
Definitely! This pie contains no meat or gelatin, and the store-bought or homemade crusts are typically vegetarian. Always check the crust packaging to be sure.
Final Thoughts
If you’re craving a classic dessert that brings smiles and pure comfort to the table, you just can’t beat Homemade Cherry Pie. The aroma of bubbling cherries, the golden crust, and the joy of sharing a generous slice are all part of what makes this pie so beloved. Give it a try—you’ll be amazed just how easy and rewarding it is to make from scratch!
Print
Homemade Cherry Pie Recipe
- Prep Time: 20 minutes
- Cook Time: 45 minutes
- Total Time: 1 hour 5 minutes
- Yield: 8 servings
- Category: Dessert
- Method: Baking
- Cuisine: American
- Diet: Vegetarian
Description
Indulge in the sweet and tangy flavors of this Homemade Cherry Pie. A classic fruit pie perfect for dessert, especially during the summer months. This easy recipe features a buttery crust filled with a luscious cherry filling, topped with a golden crust for a delightful treat.
Ingredients
Pie Filling:
- 2 (14.5-ounce) cans tart cherries in water (drained)
- 1 cup granulated sugar
- 1/4 cup cornstarch
- 1/4 teaspoon almond extract
- 1 tablespoon lemon juice
- 1/8 teaspoon salt
- 2 tablespoons butter (cut into small pieces)
Crust and Topping:
- 1 package refrigerated pie crusts (2 crusts)
- 1 tablespoon milk (for brushing)
- 1 tablespoon coarse sugar (optional, for topping)
Instructions
- Preheat the oven: Preheat the oven to 425°F (220°C).
- Prepare the filling: In a saucepan, combine cherries, sugar, cornstarch, almond extract, lemon juice, and salt. Cook until thickened.
- Assemble the pie: Roll out one crust, place in pie dish, add filling, dot with butter. Top with second crust or create a lattice pattern.
- Bake: Brush top crust with milk, sprinkle sugar if desired. Bake for 40-45 minutes until golden.
- Cool and serve: Cool for at least 2 hours before slicing and serving.
Notes
- For a homemade touch, use fresh or frozen pitted tart cherries when in season.
- You can make the pie a day ahead; store at room temperature or refrigerate and bring to room temp before serving.
- Serve with vanilla ice cream for a delicious pairing.
Nutrition
- Serving Size: 1 slice
- Calories: 370
- Sugar: 28g
- Sodium: 190mg
- Fat: 17g
- Saturated Fat: 6g
- Unsaturated Fat: 10g
- Trans Fat: 0g
- Carbohydrates: 53g
- Fiber: 2g
- Protein: 3g
- Cholesterol: 15mg


