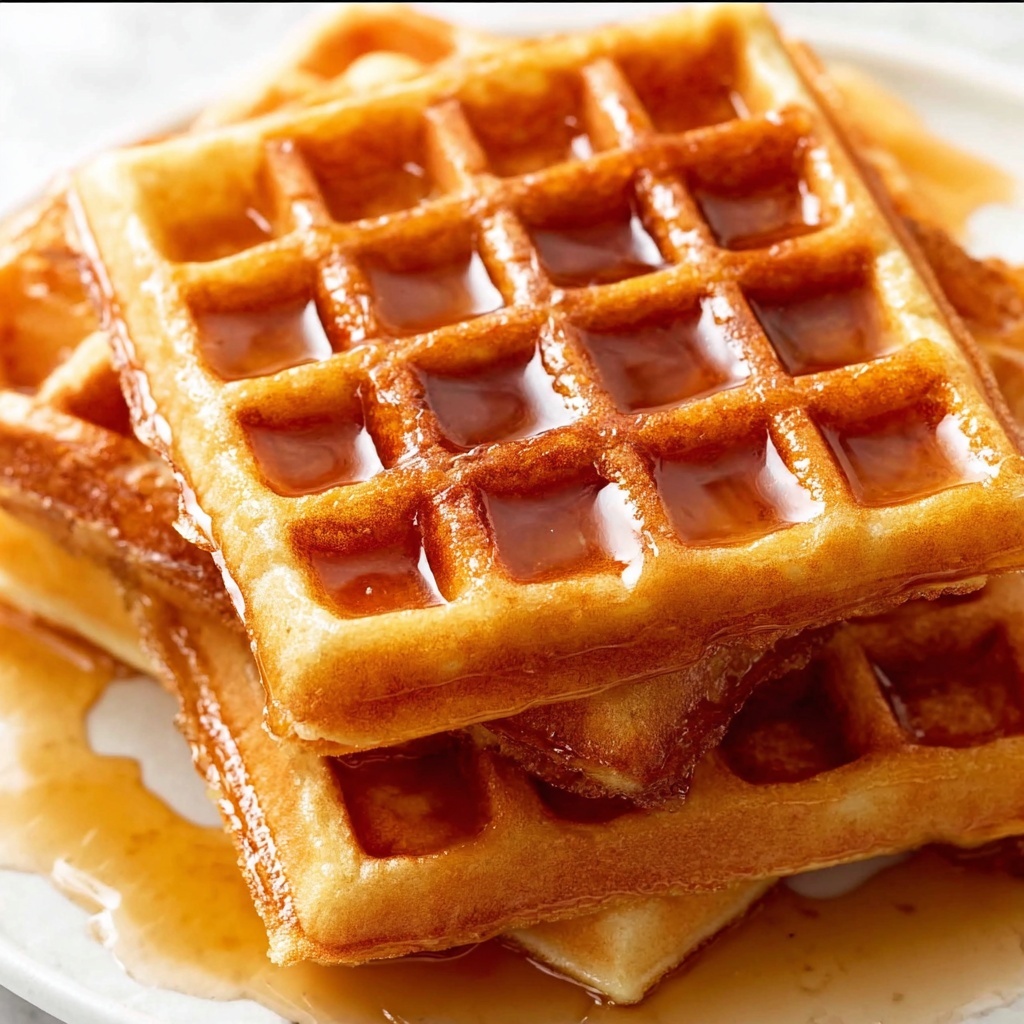
If you have been searching for a delightful breakfast that satisfies your cravings without the worry of gluten, this Easy Gluten-Free Oat Waffles Recipe is about to become your new weekend obsession. These waffles are golden, crisp on the outside, tender inside, and bursting with wholesome flavor from oat flour, all while being super simple to make. Whether you’re gluten-sensitive or just love delicious waffles, this recipe combines the perfect blend of ingredients to deliver an irresistible treat that everyone can enjoy. Trust me, once you try this Easy Gluten-Free Oat Waffles Recipe, you’ll wonder why you ever made waffles any other way!
Ingredients You’ll Need
Getting ready to whip up these waffles is delightfully straightforward because each ingredient plays a special role in creating the perfect balance of texture, taste, and nutrition. From the naturally nutty oat flour to the luscious melted coconut oil or butter, these components come together effortlessly for a standout waffle experience you will adore.
- 1 ½ cups (128 grams) oat flour: The star gluten-free base, giving the waffles their hearty, tender crumb with a subtly sweet oat flavor.
- 2 teaspoons baking powder: This helps your waffles rise beautifully, making them light and fluffy without heaviness.
- ½ teaspoon salt: Salt enhances and balances the flavors, preventing blandness in your batter.
- Pinch of cinnamon (optional): Adds a warm, cozy aroma and depth, perfect for a little extra personality in your waffles.
- ¾ cup room temperature milk of choice: From creamy cow’s milk to light coconut or nut milks, this moistens the batter, contributing to tender waffles.
- ¼ cup + 1 tablespoon melted coconut oil or 5 tablespoons unsalted butter: Fat is essential for crisp edges and rich flavor in every bite.
- 2 large eggs: Eggs bring structure and help bind all ingredients together for the perfect waffle texture.
- 2 tablespoons maple syrup: A natural sweetener that adds subtle sweetness and delightful caramel notes.
- 1 teaspoon vanilla extract: This little splash enhances all the flavors and gives a lovely aromatic lift to the batter.
How to Make Easy Gluten-Free Oat Waffles Recipe
Step 1: Mix Dry Ingredients
Start by whisking the oat flour, baking powder, salt, and a pinch of cinnamon in a large bowl. This ensures all your dry ingredients are evenly distributed, which is key for waffles with consistent texture and flavor throughout. Taking this step seriously will pay off when every bite feels just right.
Step 2: Combine Wet Ingredients
In a separate bowl, whisk together the milk, melted coconut oil or butter, eggs, maple syrup, and vanilla extract until smooth and fully combined. If your coconut oil has solidified, gently warm the mixture in short bursts in the microwave until it’s liquid again but not hot. This step creates a velvety wet mixture that will meld perfectly with your dry ingredients.
Step 3: Combine Wet and Dry Mixtures
Pour the wet ingredients into the dry bowl and gently stir with a large spoon until just combined. Don’t worry if the batter looks a little lumpy – overmixing can make waffles tough. Let the batter rest for 10 minutes; this gives the oat flour time to absorb the liquid and results in a waffle that’s tender but not gummy.
Step 4: Preheat Waffle Iron
While your batter takes a breather, plug in your waffle iron and preheat it. Aim for a medium-high temperature if your iron has settings—this heat level helps produce that perfect golden crust and crisp edges we all love about waffles.
Step 5: Cook Waffles
After resting, give the batter a quick stir to even it out. Pour enough batter to cover the center and much of the waffle iron’s surface, close the lid, and let it cook until deeply golden and crisp. The exact time depends on your waffle iron, but keep an eye out for that irresistible color and aroma signaling they’re ready.
Step 6: Cool and Serve
Transfer each waffle to a cooling rack or baking sheet to keep them crisp—avoid stacking as that traps steam and can make waffles soggy. To keep waffles warm while finishing the batch, place them in a 200°F oven. Serve hot with maple syrup, nut butter, fresh fruit, or your favorite toppings for a magnificent breakfast feast.
How to Serve Easy Gluten-Free Oat Waffles Recipe
Garnishes
Waffles are a perfect canvas for creativity. Top yours with fresh berries, banana slices, or a handful of toasted nuts for crunch. A dollop of yogurt or whipped cream adds a luscious creaminess, while a drizzle of honey or additional maple syrup elevates sweetness naturally. Bright zests like lemon or orange can also add a fresh twist that partners wonderfully with the warm cinnamon notes.
Side Dishes
For a hearty breakfast or brunch, pair these oat waffles with savory sides like crispy bacon or seasoned sausage to contrast the sweetness. A simple spinach or mixed greens salad adds a burst of color and freshness, balancing out the richness of the waffles. Don’t forget a warm cup of coffee, tea, or freshly squeezed juice to complete your meal.
Creative Ways to Present
Want to impress guests? Stack waffles into a tower between layers of cream and fruit for a show-stopping waffle cake. Alternatively, use cookie cutters to create fun shapes or cut the waffles into bite-sized pieces to serve as party finger food with dipping sauces like chocolate or fruit compote. Presentation is half the fun and encourages everyone to dig in with joy.
Make Ahead and Storage
Storing Leftovers
Leftover waffles can easily be stored in an airtight container or wrapped tightly in foil at room temperature for up to 2 days. Sealing them well helps keep their texture intact, but eating them sooner rather than later ensures you enjoy the best flavor and crispness.
Freezing
To extend their lifespan, freeze leftover waffles by first placing them in a single layer on a baking sheet. Once frozen solid, transfer them to a resealable freezer bag or airtight container. This method prevents waffles from sticking together and allows you to enjoy homemade waffles anytime for up to 2 months.
Reheating
The best way to reheat gluten-free oat waffles is in a toaster or oven to restore that fresh-from-the-waffle-iron crispiness. Heat at 350°F for about 5-10 minutes, flipping halfway through. Avoid microwaving if possible as it tends to make waffles chewy or soggy. Perfectly reheated waffles taste almost as good as the first time around.
FAQs
Can I use regular flour instead of oat flour for this recipe?
While you can substitute, this recipe is specially crafted to highlight oat flour, giving a unique flavor and texture perfect for gluten-free diets. Using regular flour would change the texture and introduce gluten, so tread carefully based on your needs.
Is this recipe suitable for vegan diets?
This recipe uses eggs and butter or coconut oil, so it’s not vegan as-is. However, you can experiment by replacing eggs with flax or chia egg substitutes and using plant-based butter or oils to make it vegan-friendly.
Why do I need to let the batter rest before cooking?
Letting the batter sit allows the oat flour to fully absorb the liquids, resulting in waffles that are tender without being gummy. Resting also improves the batter’s consistency making it easier to cook evenly in the waffle iron.
Can I make the batter in advance?
While you can prepare the batter a few hours ahead and keep it refrigerated, it’s best to cook waffles within a day to maintain freshness and texture. Stir gently before cooking as the batter may thicken as it rests.
What if my waffles stick to the waffle iron?
To prevent sticking, ensure your waffle iron is well preheated and lightly greased with oil or non-stick spray before each batch. Avoid using too much batter, and let the waffle cook fully until golden before attempting to remove it.
Final Thoughts
I cannot recommend this Easy Gluten-Free Oat Waffles Recipe enough for anyone looking to enjoy homemade waffles without gluten-related worries. The simple combination of pantry staples and thoughtful steps makes every bite a delightfully crispy, fluffy, and flavorful experience. So go ahead, gather your ingredients, fire up your waffle iron, and treat yourself and your loved ones to a breakfast that’s as comforting as it is unforgettable!
Print
Easy Gluten-Free Oat Waffles Recipe
- Prep Time: 10 minutes
- Cook Time: 15 minutes
- Total Time: 25 minutes
- Yield: 6 servings
- Category: Breakfast
- Method: Baking
- Cuisine: American
- Diet: Gluten Free
Description
This easy gluten-free oat waffles recipe offers a delicious and healthy breakfast option made with certified gluten-free oat flour. Soft on the inside and crispy on the outside, these waffles come together quickly using simple pantry ingredients and can be enjoyed with your favorite toppings like maple syrup or nut butter. Perfect for those avoiding gluten but craving classic homemade waffles.
Ingredients
Dry Ingredients
- 1 ½ cups (128 grams) oat flour, certified gluten-free if necessary
- 2 teaspoons baking powder
- ½ teaspoon salt
- Pinch of cinnamon (optional)
Wet Ingredients
- ¾ cup room temperature milk of choice (light coconut milk, nut milk, or cow’s milk)
- ¼ cup + 1 tablespoon melted coconut oil, or 5 tablespoons unsalted butter, melted
- 2 large eggs
- 2 tablespoons maple syrup
- 1 teaspoon vanilla extract
Instructions
- Mix Dry Ingredients: In a large mixing bowl, whisk together the oat flour, baking powder, salt, and optional cinnamon. Mix well to ensure even distribution of all dry ingredients.
- Combine Wet Ingredients: In a separate bowl, whisk the milk, melted coconut oil or butter, eggs, maple syrup, and vanilla extract until fully combined. If the coconut oil solidifies, warm the mixture gently in short microwave intervals until smooth.
- Combine Wet and Dry Mixtures: Pour the wet ingredients into the dry ingredients bowl and stir gently with a large spoon until just combined. Some lumps are okay. Let the batter rest for 10 minutes to allow the oat flour to absorb the liquid properly.
- Preheat Waffle Iron: While the batter rests, plug in your waffle iron and preheat it. Set the temperature or browning dial to medium-high if available, for the best texture and browning.
- Cook Waffles: After resting, stir the batter briefly. Pour enough batter onto the hot waffle iron to cover the center and much of the surface, then close the lid. Cook until waffles are deeply golden brown and crisp on the outside.
- Cool and Serve: Transfer cooked waffles to a cooling rack or baking sheet to keep them crisp, avoiding stacking. To keep waffles warm, place them in a 200°F oven until serving. Repeat cooking with remaining batter. Serve warm with maple syrup, nut butter, or favorite toppings.
Notes
- Resting the batter allows the oat flour to absorb moisture, improving texture and binding.
- If using coconut oil, keep melted but avoid letting it solidify; rewarm gently as needed.
- Adjust waffle iron settings based on your device for perfect browning.
- Store leftover waffles in an airtight container and reheat in a toaster or oven to maintain crispness.
- For a dairy-free version, use plant-based milk and coconut oil instead of butter.


